Begin by accessing your uAIgent HubOne platform after onboarding. Upon reaching the dashboard, locate and select the Create Agent button at the upper right of the screen to launch the agent creation wizard. This is the entry point for all agent setup activities.
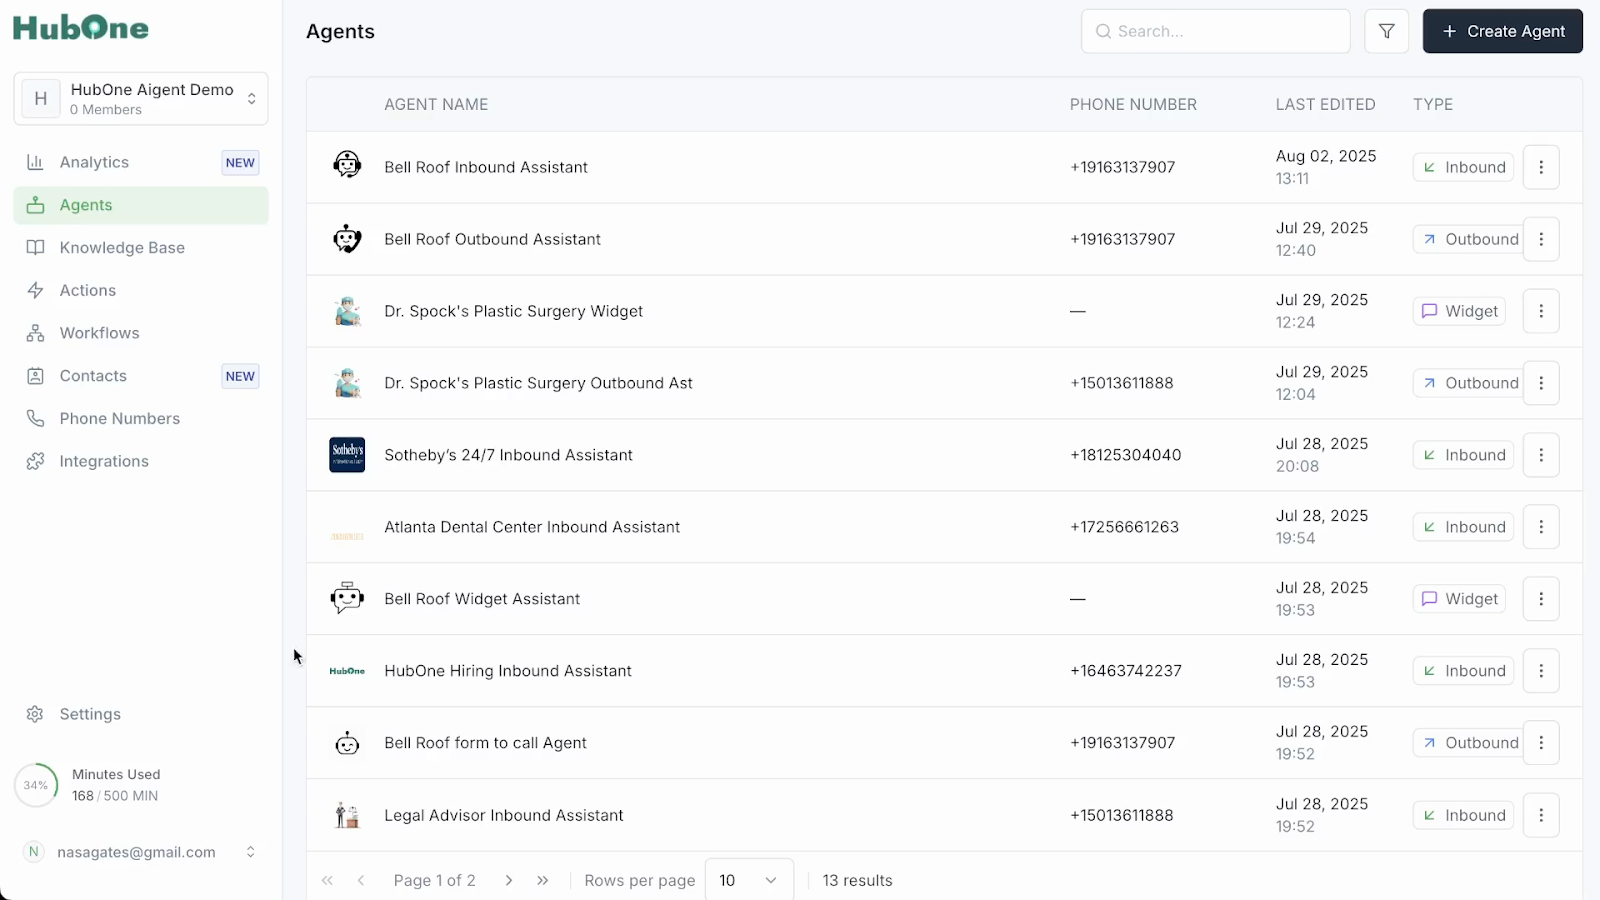
If you haven’t onboarded a client, find a guide here
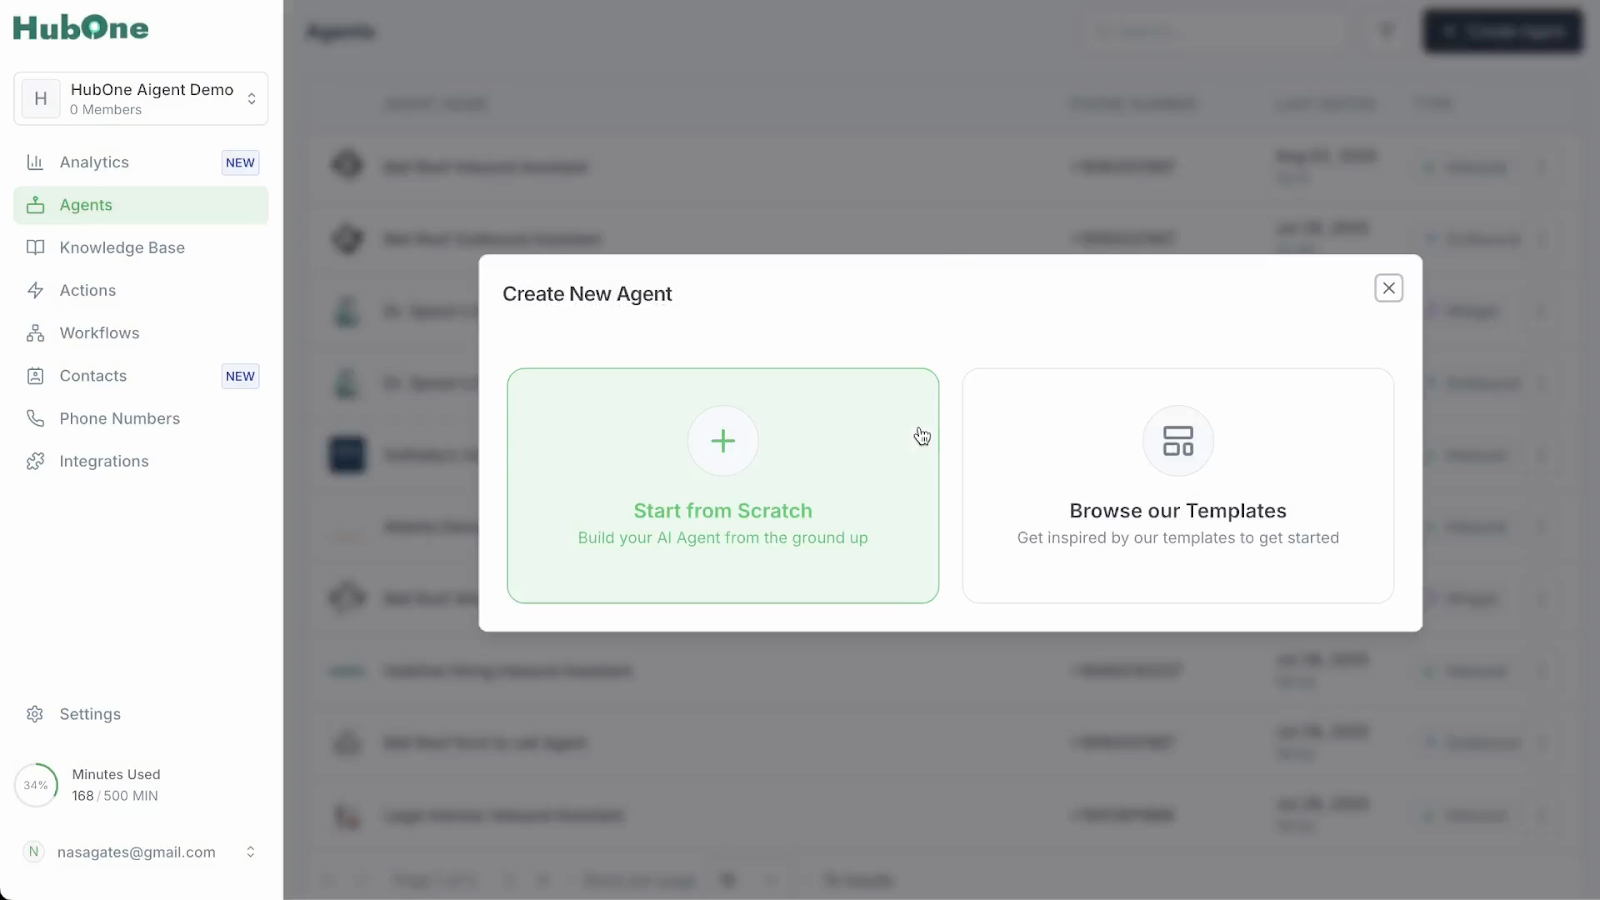
At this stage, you decide whether to use a pre-built template or build from scratch. Templates can accelerate deployment for common scenarios, but for maximum control and custom logic, choose to Create from Scratch.
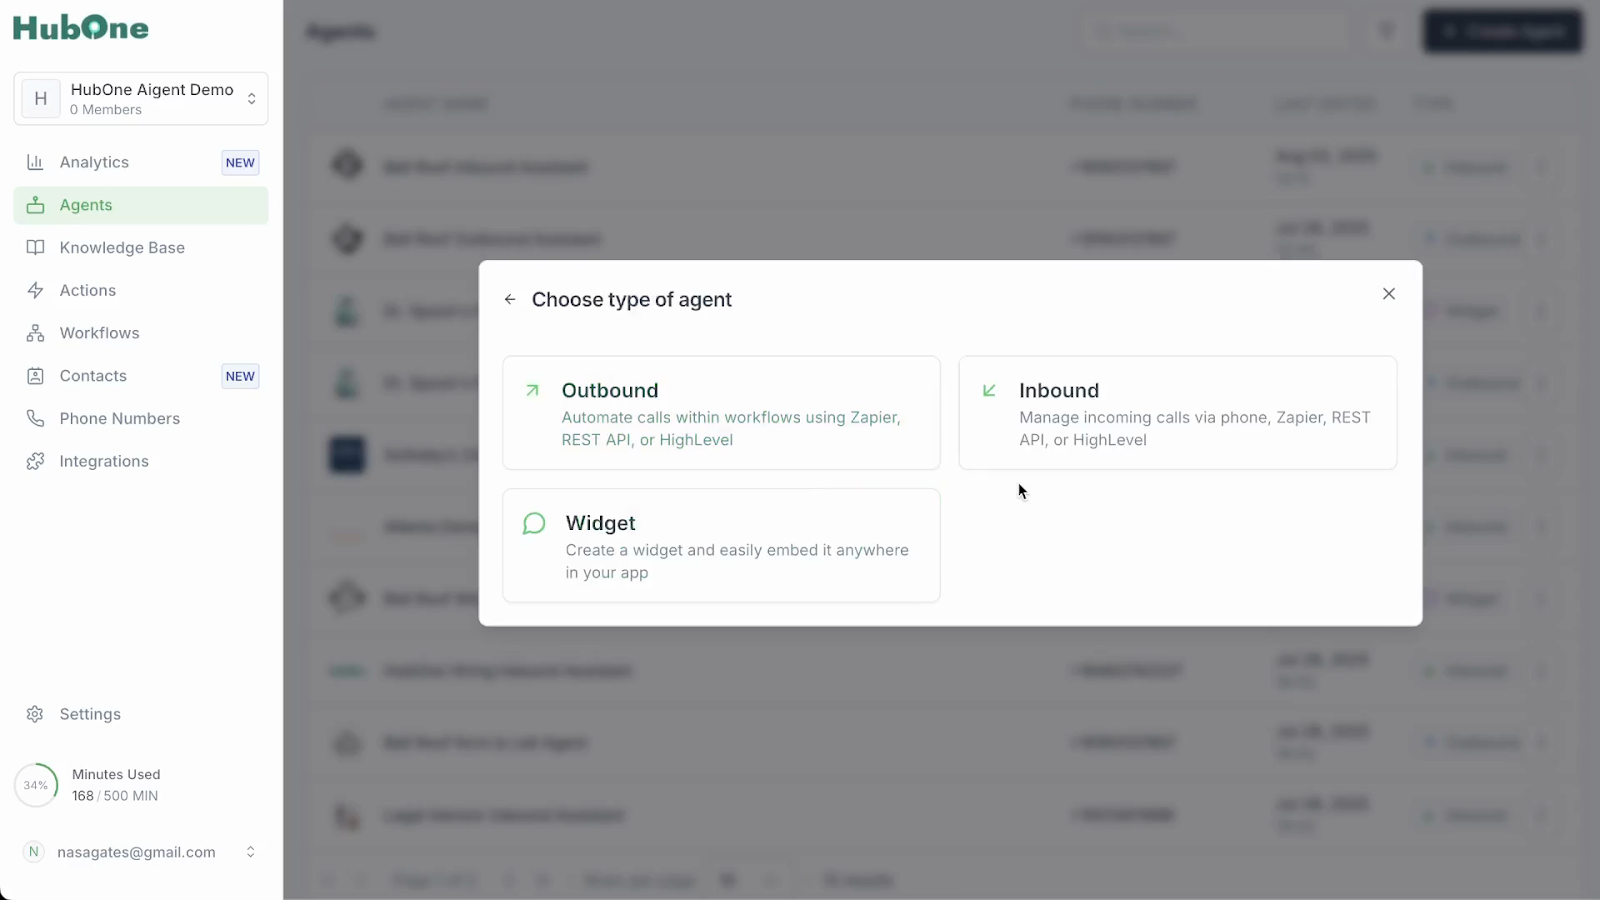
Choosing the correct agent type is essential for aligning its capabilities with your strategic intent.
Inbound Agent: Responds to incoming customer calls. Ideal for handling support hotlines, acting as a virtual receptionist, or qualifying inbound leads.
Outbound Agent: Proactively initiates calls to contact lists. Perfect for sales outreach, appointment reminders, customer surveys, or lead follow-up campaigns.
Widget: Embeds an interactive assistant directly into your website for seamless, real-time lead capture and support.
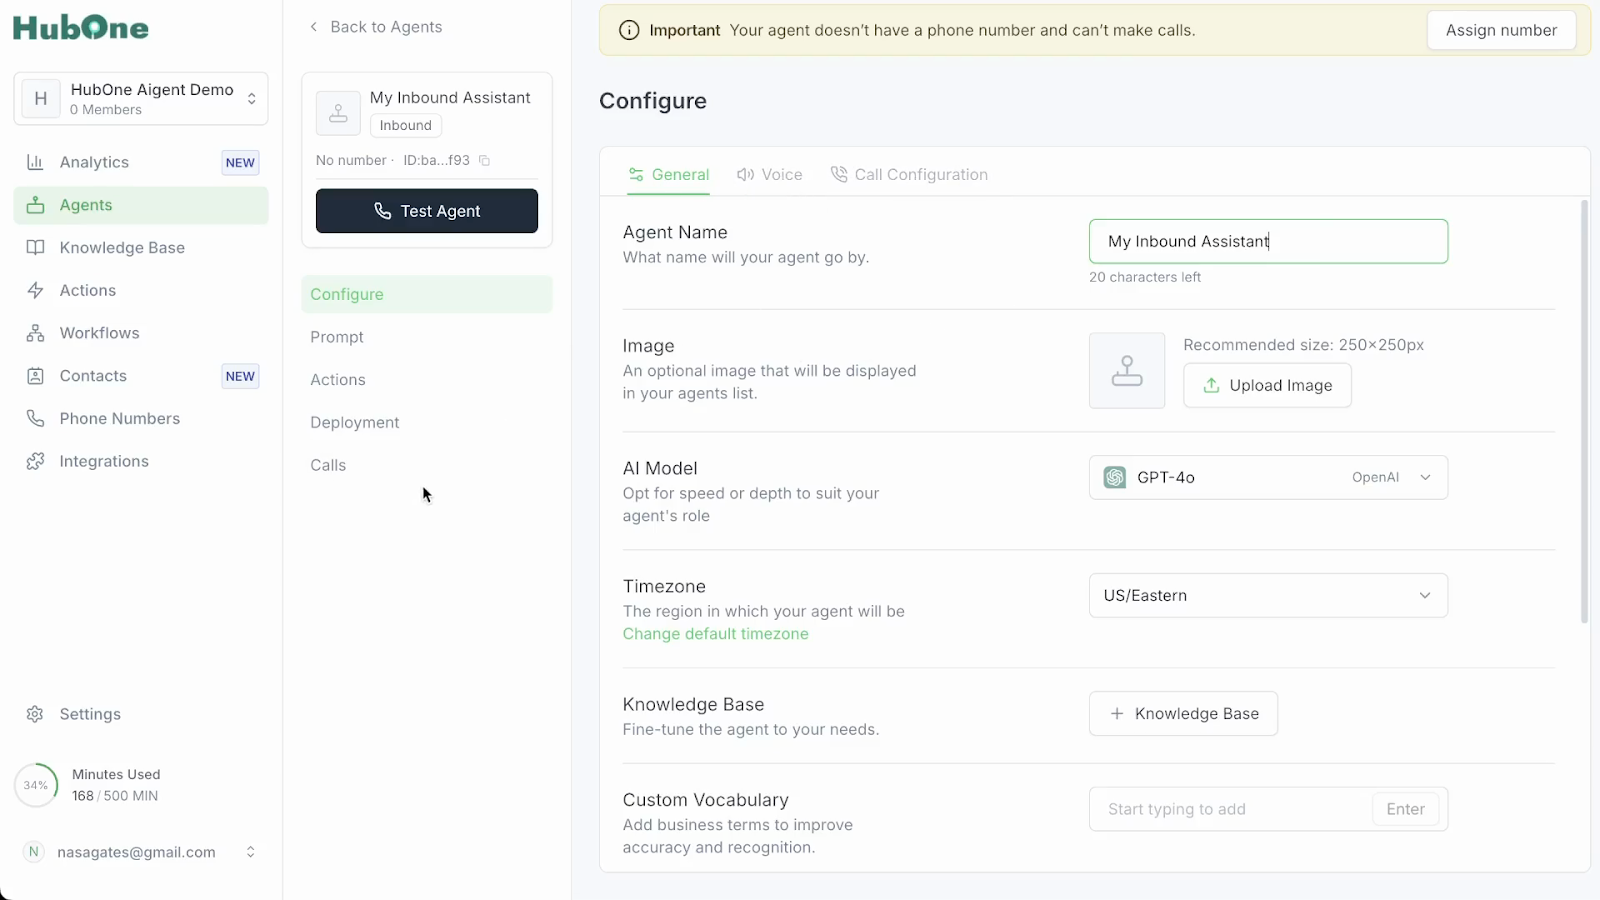
With the agent type selected you will see a list of basic configurations for the agent in the General tab:
Name: Change the system-generated name to something clear and descriptive.
Personalize Appearance: Upload a relevant image or logo.
Time Zone: It's crucial to set the correct time zone to ensure all scheduling, logs, and reports are accurate.
Equip your agent with the expertise it needs for effective and compliant conversations.
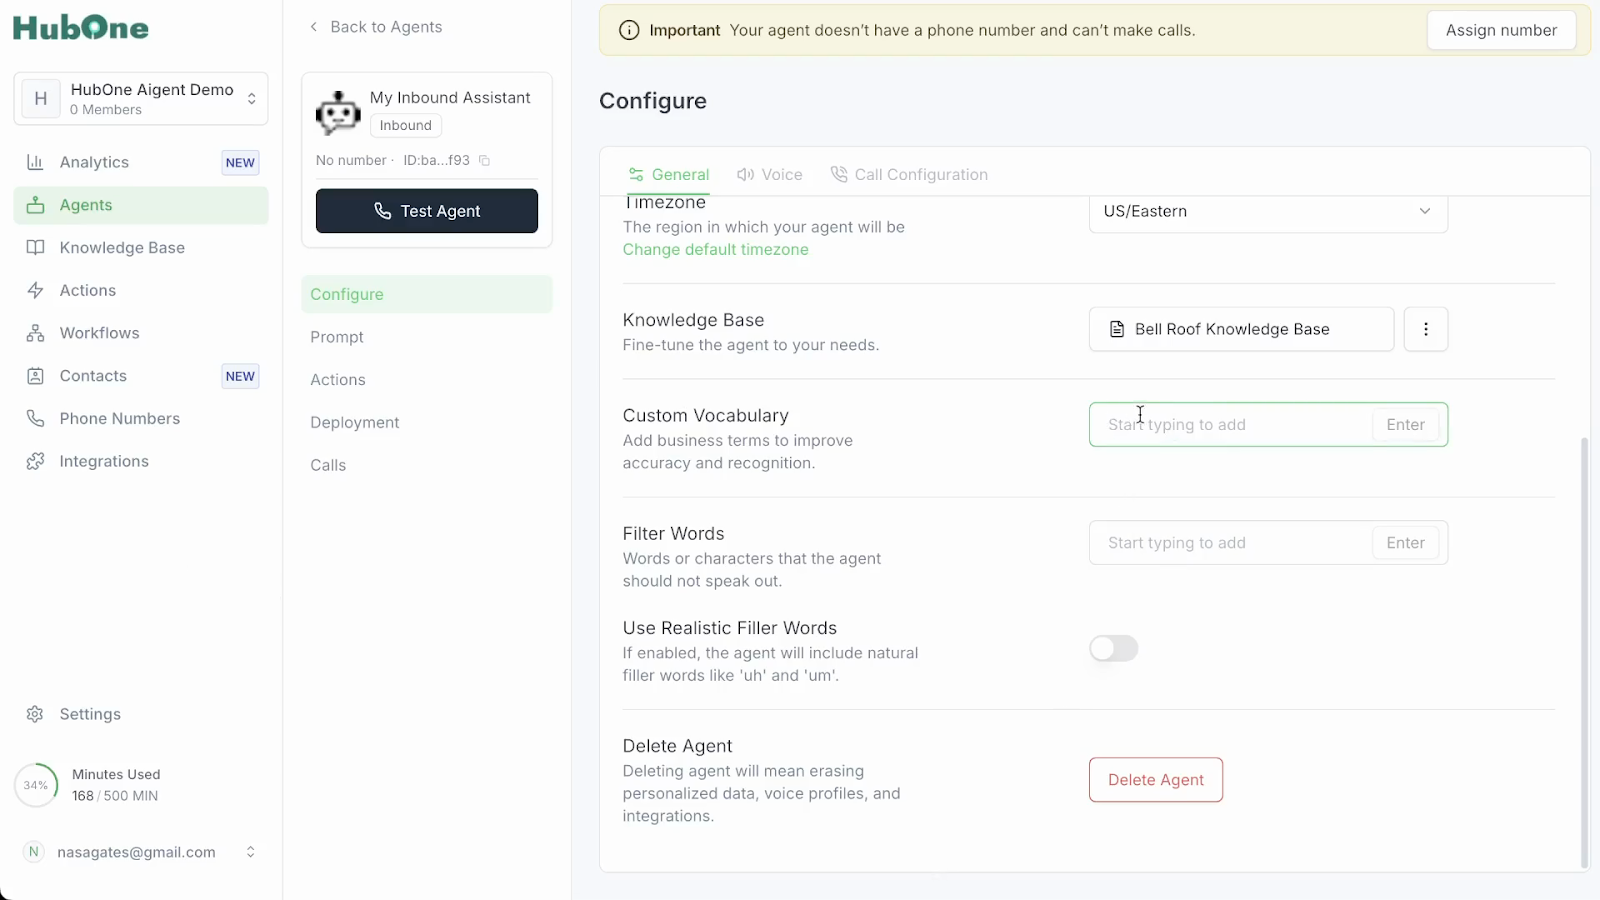
Link a Knowledge Base: Attach a pre-built repository of standard answers, product information, and policies. If you don’t have one, create one first.
Add Custom Vocabulary: Enter specialized business terms and industry jargon (e.g., "asphalt," "shingles" for a roofing company). This sharpens the agent’s comprehension and allows it to speak your brand's language.
Establish Filter Words: Create a list of "forbidden" words or phrases the agent should never say, such as competitor names, sensitive topics, or misleading phrases like "100% guarantee." This is a critical step for reducing liability and ensuring regulatory compliance.
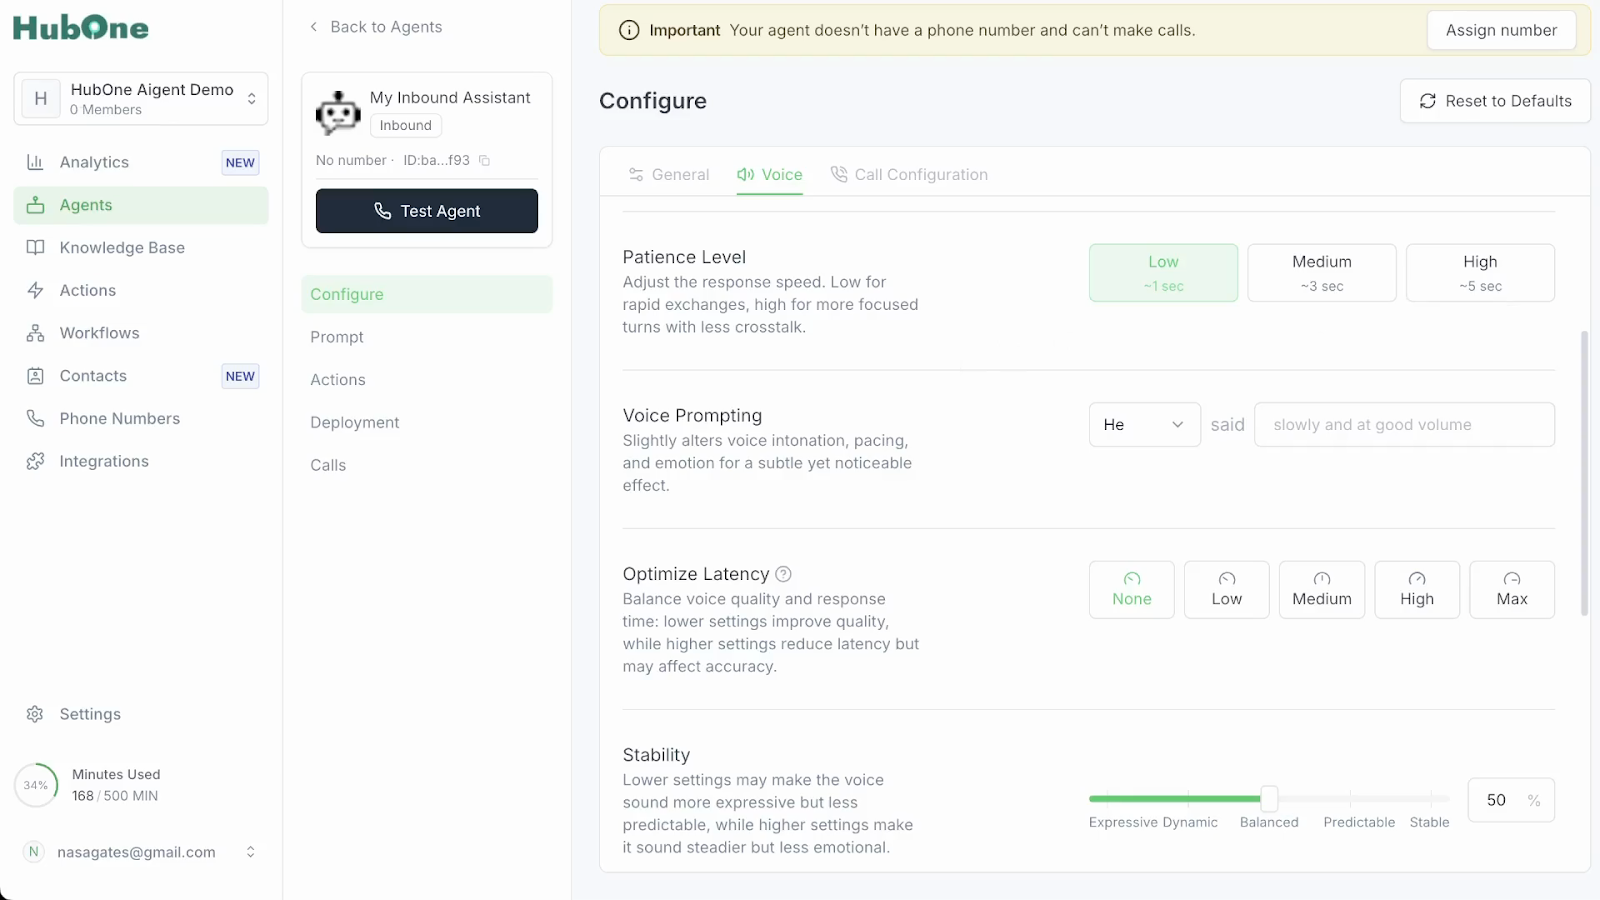
In the Voice tab, tailor the agent’s communication style to create a strong, trustworthy connection with your customers.
Select an AI Model: Choose the best-suited language model (e.g., GPT-4.0), considering the balance between performance, accuracy, and cost.
Select Supported Languages: Choose from the available languages, but be aware that options in "beta" may be less stable and require thorough testing before production use.
Select or Clone a Voice: Test different voices to find the best fit. To use a cloned voice, upload at least five clear audio samples with no background noise. The voice will appear as an option once processed.
Adjust "Patience" and Response Timing: Control the pause after a user speaks. A shorter pause is good for fast-paced support, while a longer one allows customers time to think. Calibrate the latency-performance slider to balance response speed with richer audio output.
Refine Vocal Style: Adjust voice stability and style exaggeration to give the agent an appropriate personality—from highly professional to more energetic.
Manage Interruptions and Silence: Enable a fast fade-out to prevent the agent from being cut off abruptly when a user interrupts. Configure idle handling strategies, including how long the agent waits in silence and what it says (e.g., "Are you still there?") to re-engage the caller.
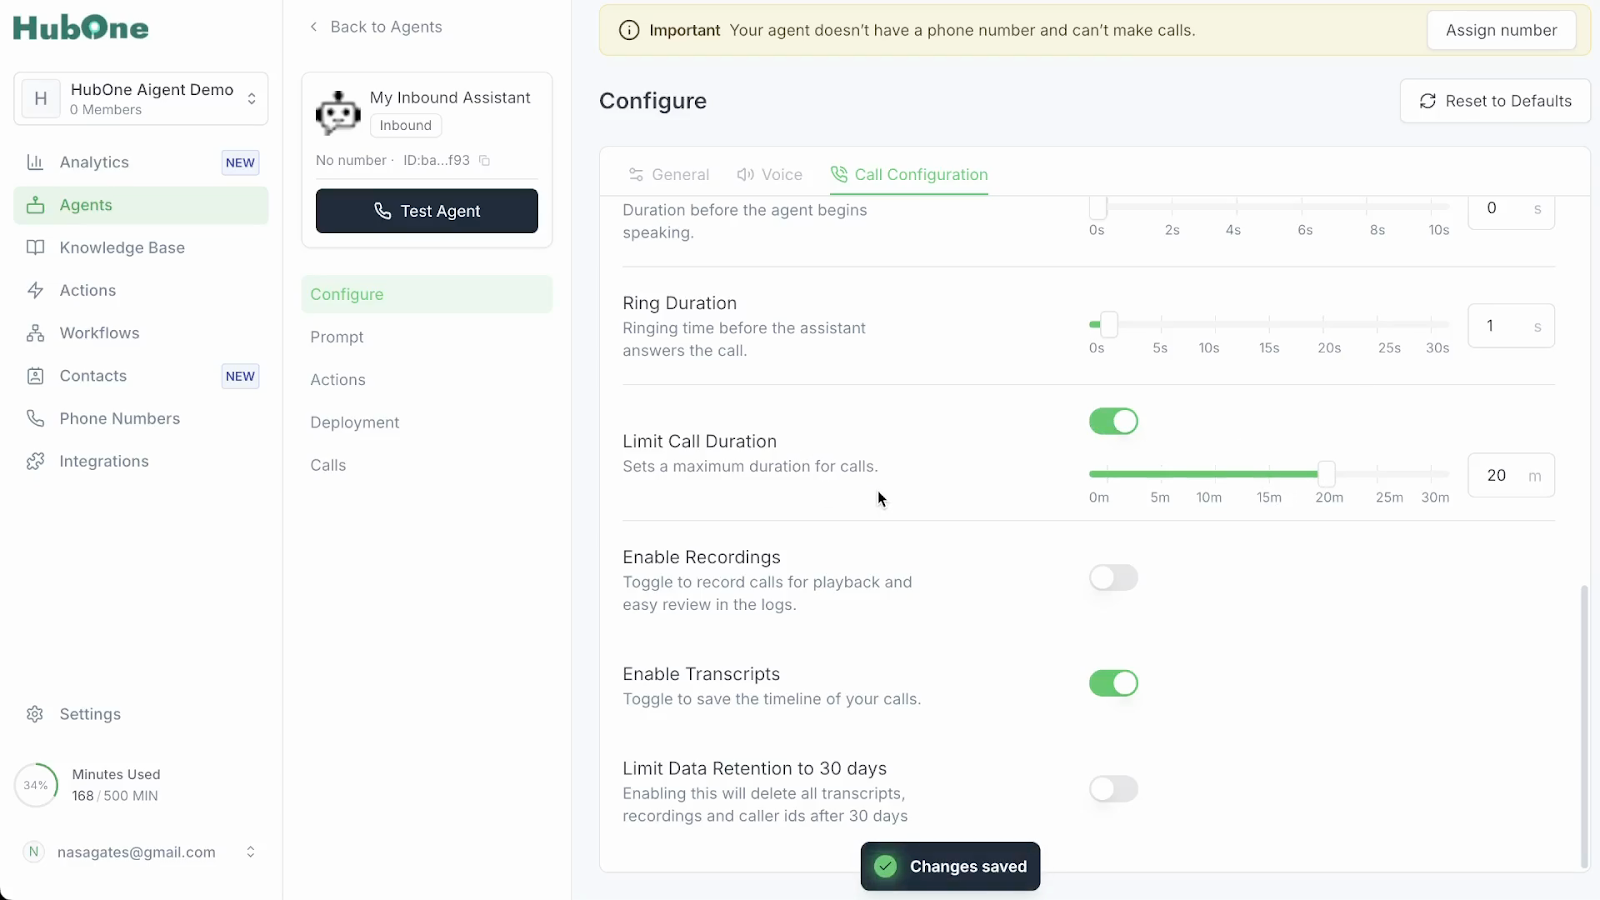
Under Call Configuration, delve into the agent’s operational performance with a suite of advanced controls.
Enhance Audio Clarity: Start with "advanced" noise cancellation. Add subtle background sounds (like a quiet office) only if it fits your brand's desired authenticity; most businesses opt for maximum clarity.
Set Call Parameters: Select a ringtone and adjust the ring duration to avoid excessive waiting. Define a maximum call length (e.g., 20 minutes) to conserve resources and control costs.
Enable Call Recording and Transcription: Activate these features for quality assurance and training, but ensure you comply with all data regulations.
Manage Data Retention: Use the data deletion options to automatically purge data after 30 days. This is a critical feature for complying with privacy requirements like GDPR.
Design conversations that flow effortlessly and trigger workflows by switching to Prompt in the menu on the left.
Craft Effective Prompts: Use the advanced text editor to build dialogue. For better organization, draft complex prompt sets in a separate text file for proofreading. Use variables (e.g., {customer_name}) to personalize every conversation.
Configure Actions: Map out actions for each stage of the call:
Pre-call: Fetch lead information from a CRM.
During-call: Set up real-time appointment bookings or enable call transfers to human agents.
Post-call: Extract and dispatch call data, flag Do Not Call (DNC) requests, and send summaries to your business systems.
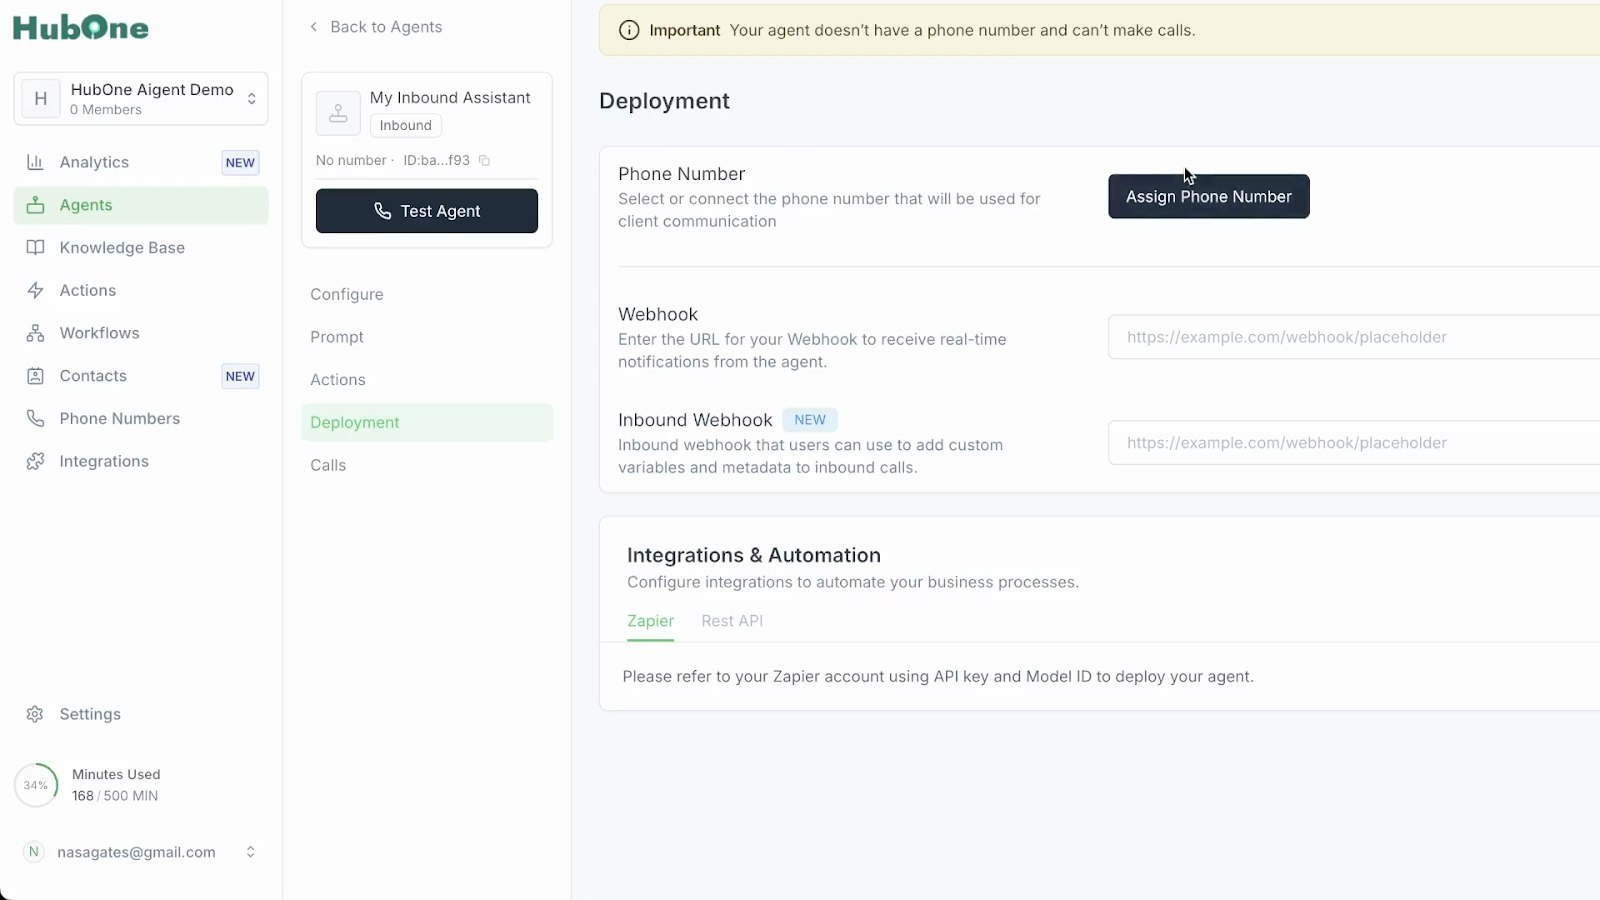
Lastly, in the Deployment tab, you can manage assigned numbers and configure integrations to ensure seamless operation.
Phone Number Management: You can assign unique phone numbers to each agent. If you need to reassign a number and encounter an error, remember to first detach it from its previous agent before making the new assignment.
How to Connect Your Numbers: You have two flexible options for integrating phone numbers with your uAIgent account:
Purchase directly from uAIgent: For $1.50/month (available in US, Canada, Australia), this option includes all telecommunication costs. Please note these numbers are non-transferable and are dedicated exclusively to your Aigent360 bot.
Connect your existing Twilio account: Leverage any number or region you already have in your Twilio account. All associated phone number purchase and telecommunication costs will be billed directly by Twilio.
Important: You can only use one of these connection methods at a time.
Phone Number Allocation Rules:
For Inbound Bots: Each Inbound Bot requires its own unique phone number. A single phone number cannot be simultaneously assigned to more than one Inbound Bot.
For Outbound Bots: You can assign the same phone number to multiple Outbound Bots. However, ensure their calls are not triggered at the exact same time, as one number cannot make concurrent outbound calls from different bots.
Website Widget Integration: For agents designed as website widgets, simply copy the automatically generated code snippet. Paste this code into your website's HTML, making sure to test it thoroughly in a development environment before deploying to production.
Outbound Webhooks: Utilize the provided webhook URLs to send real-time notifications – such as call completions, transcripts, or captured lead data – to external systems like your CRM, Slack, or Zapier.
Inbound Webhooks: Configure inbound webhooks to feed crucial contextual data into the agent at the start of a call. This might include customer account details, which are vital for creating personalized and informed conversations.
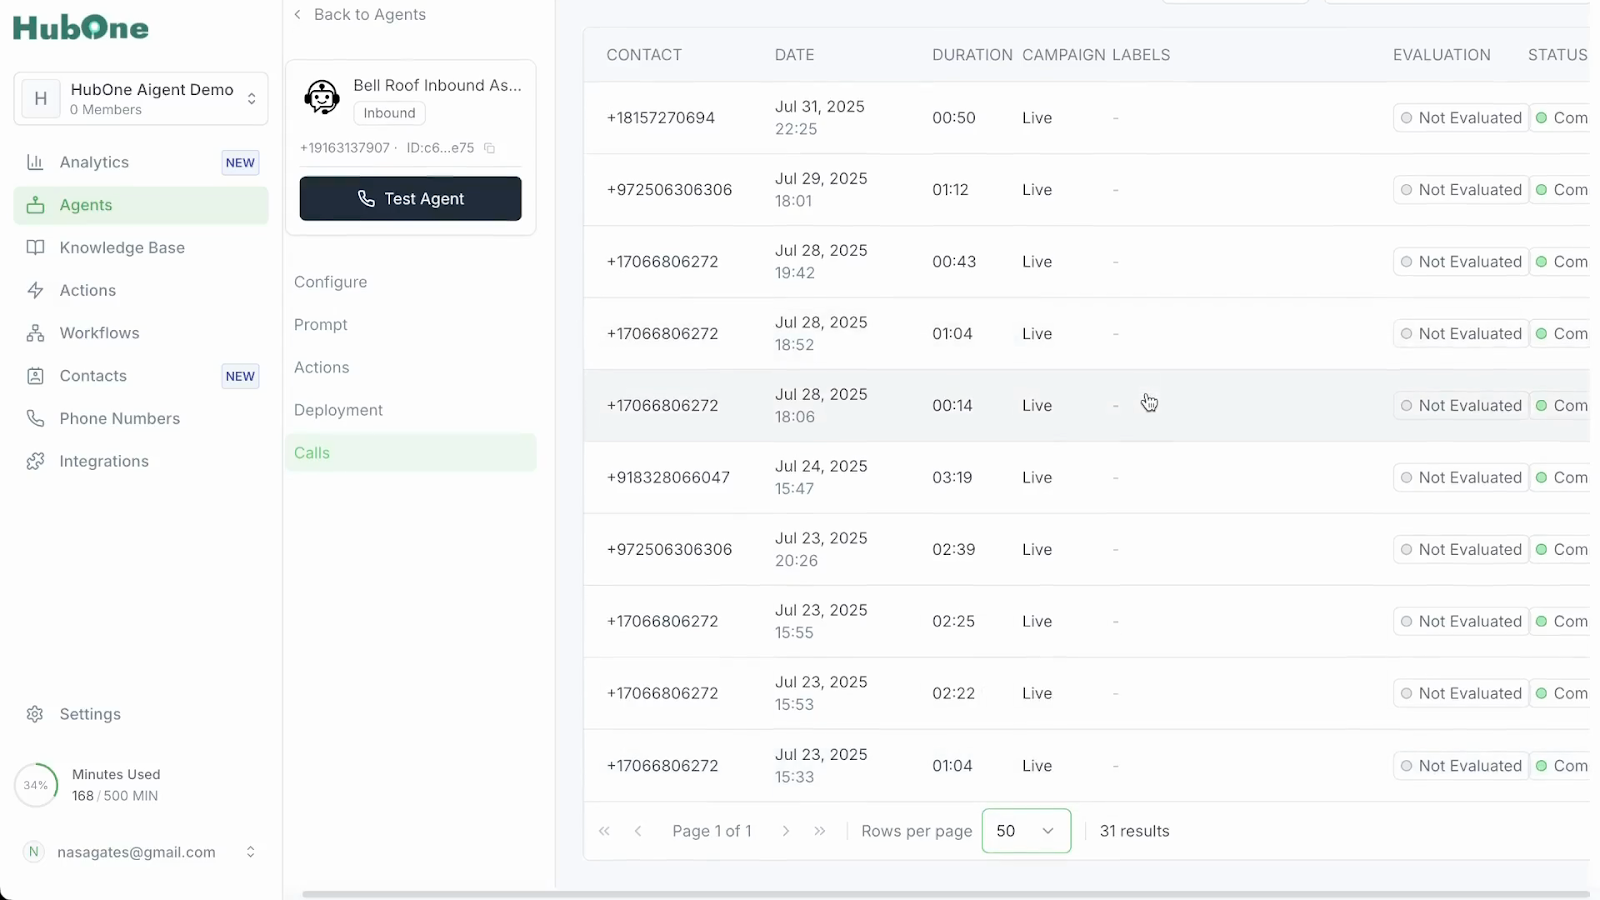
Maintain quality by actively reviewing the agent’s performance.
Examine Detailed Call Logs: Scrutinize call records, which include audio recordings, full transcripts, outcome analysis, and a history of agent actions. This is essential for diagnosing issues and finding training opportunities.
Conduct Real-World Tests: Place sample calls from various perspectives to ensure configurations work as intended. Proactively iterate on your settings as business needs evolve and you identify new use cases for your powerful, customized agent.