Step 1: Log in to your umbrella account. In your browser, access the platform’s login page and enter your username and password in the designated fields. Click Log In to access the dashboard.
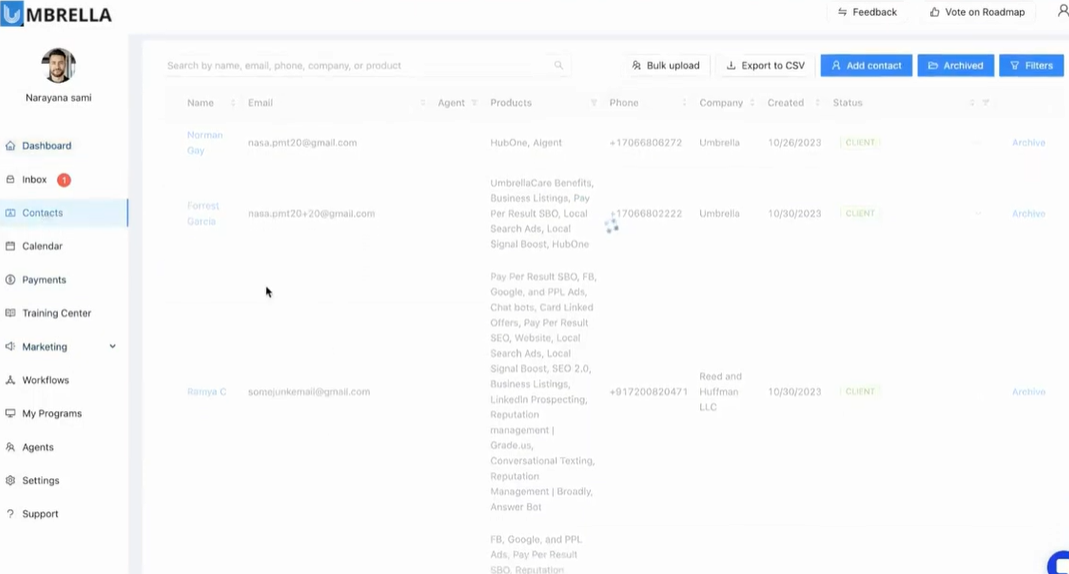
Step 2: Go to the contacts section to select the business or end-user under which you’re placing an order. Use the sidebar or top navigation to find Contacts. Scroll or use the search bar to locate the intended contact. Clicking a contact exposes details and ordering options relevant to their account type, role, and billing model.
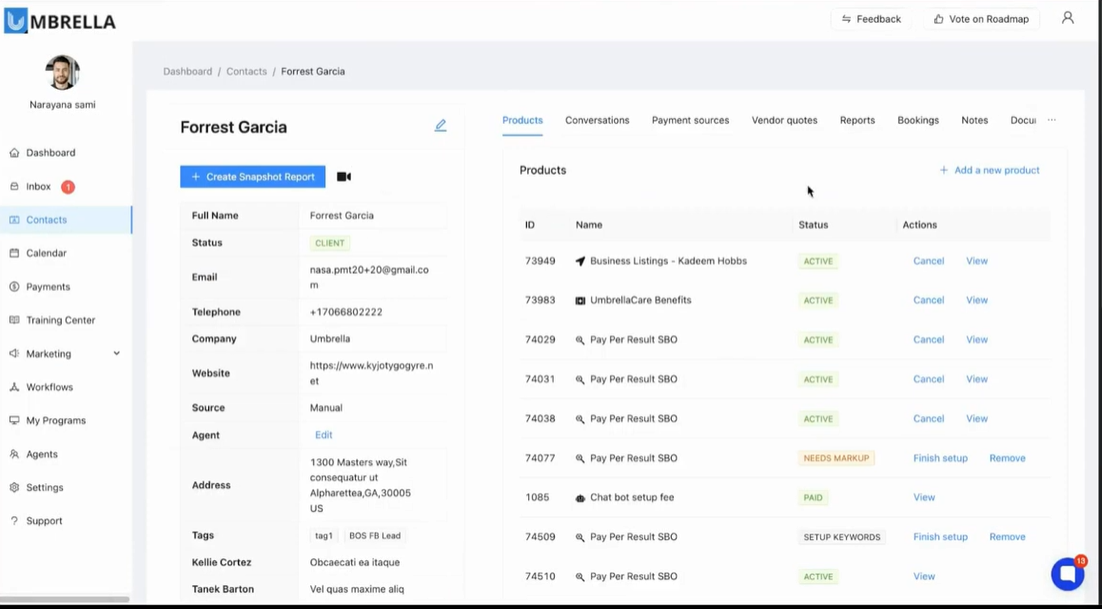
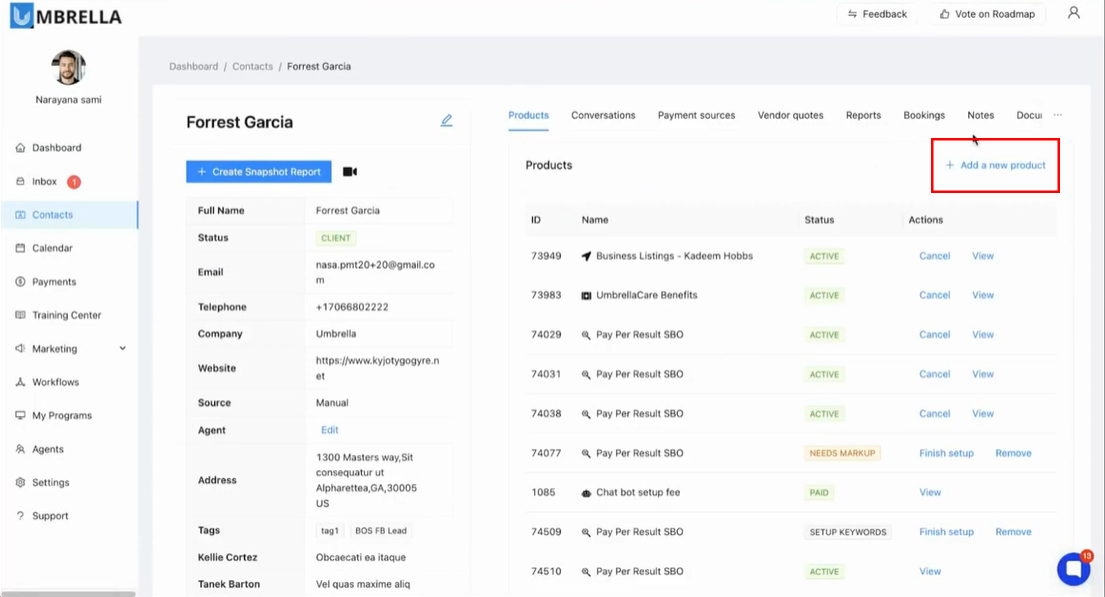
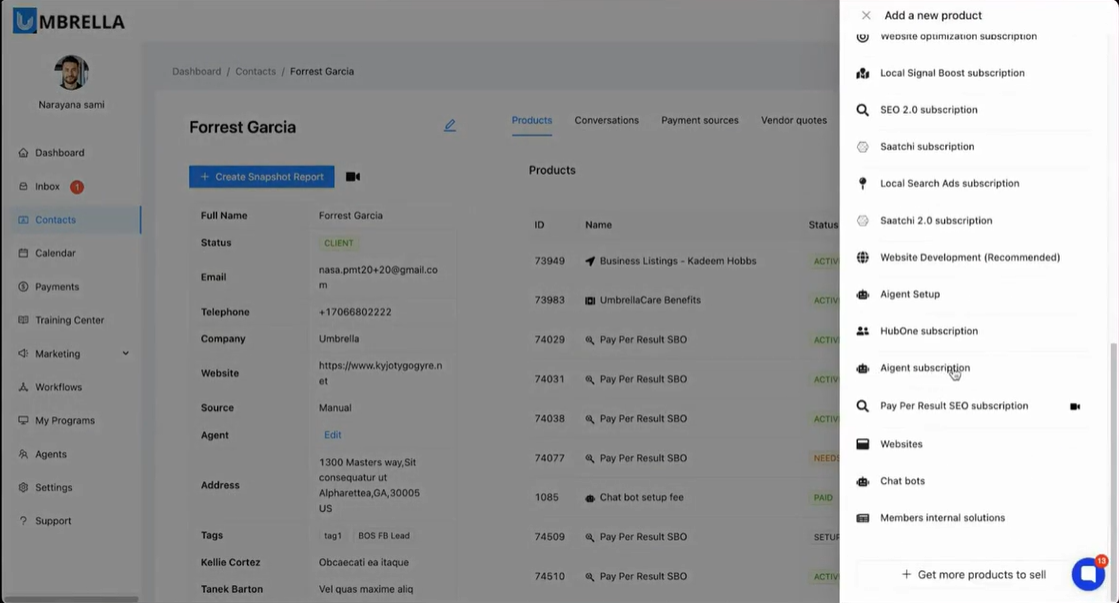
Step 3: In the selected contact's details, look for the add new product button. Initiating this action launches a workflow.
Step 4: Select AIgent subscription from the product list. Click AIgent subscription to initiate setup.
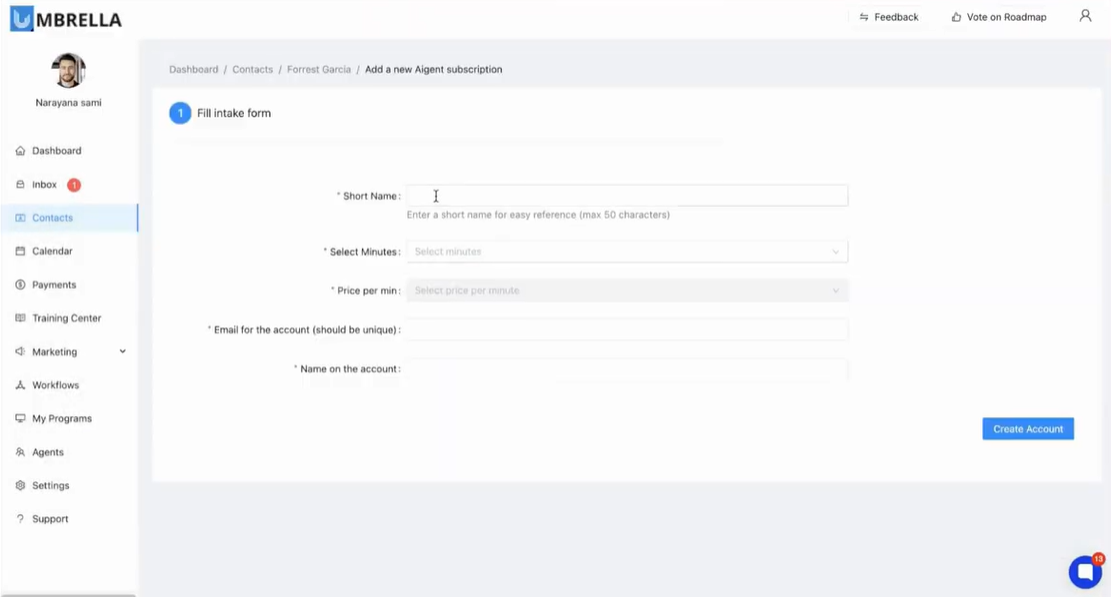
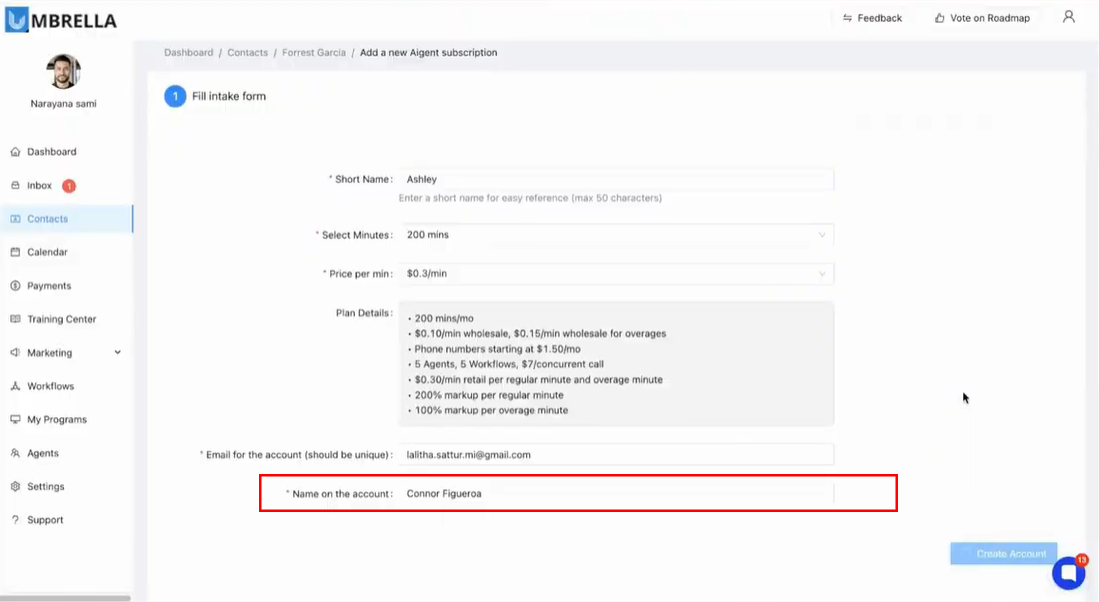
Step 5: Enter a short, descriptive name in the provided field. This is important for tracking subscriptions—use meaningful labels (like a department, client, or agent’s name). For example, "Ashley." Proper labeling is crucial when managing multiple clients
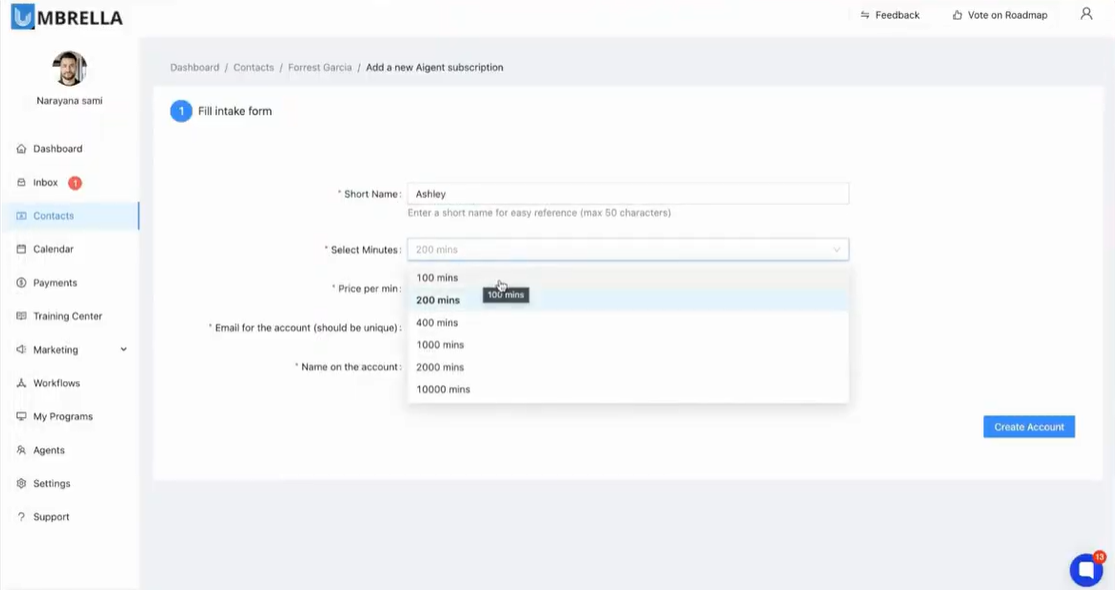
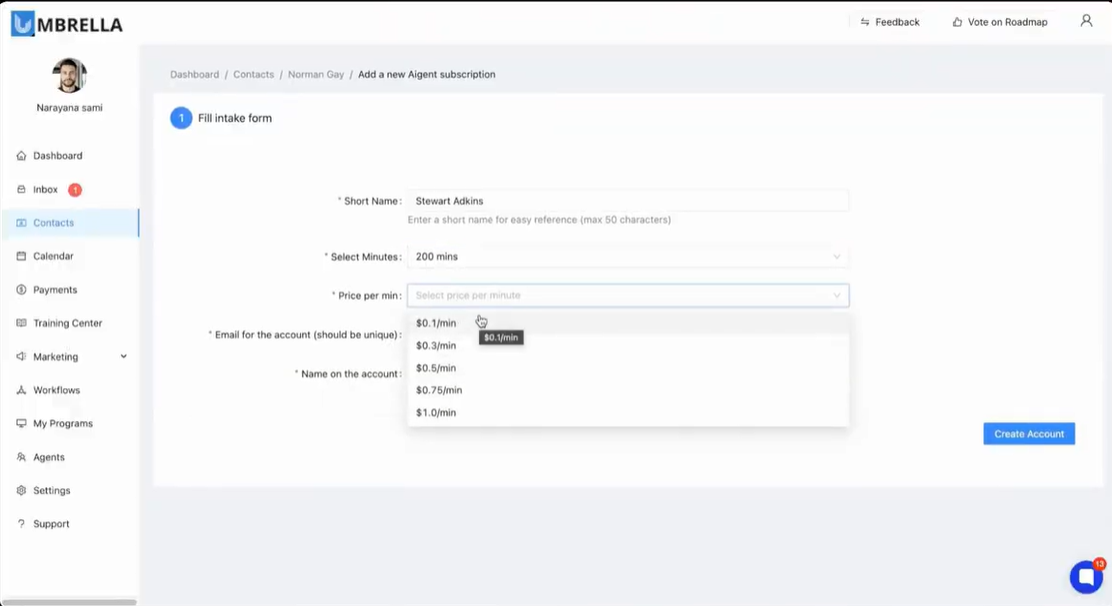
Step 6: Choose the allotted subscription minutes. Select a plan that fits anticipated usage—common options include 100, 200, 400, 2,000, or 10,000 minutes. Then from the "Price per min" dropdown, select the rate you wish to charge the end customer. Options range from a base wholesale price (e.g., $0.10/min) to various marked-up retail prices (e.g., $0.30/min, $0.50/min, etc.). Choosing the lowest rate signifies a wholesale plan with no markup, while selecting higher rates automatically applies a markup, which is detailed in the plan summary.
Step 7: As you select the minutes and price, a "Plan Details" section automatically populates below. This summary provides a transparent breakdown of the entire plan, including the number of included minutes, the wholesale cost per minute, the wholesale cost for overages, the monthly fee for phone numbers, and the retail markup percentages being applied to both regular and overage minutes. Review this information carefully to ensure it aligns with your billing and profitability goals.
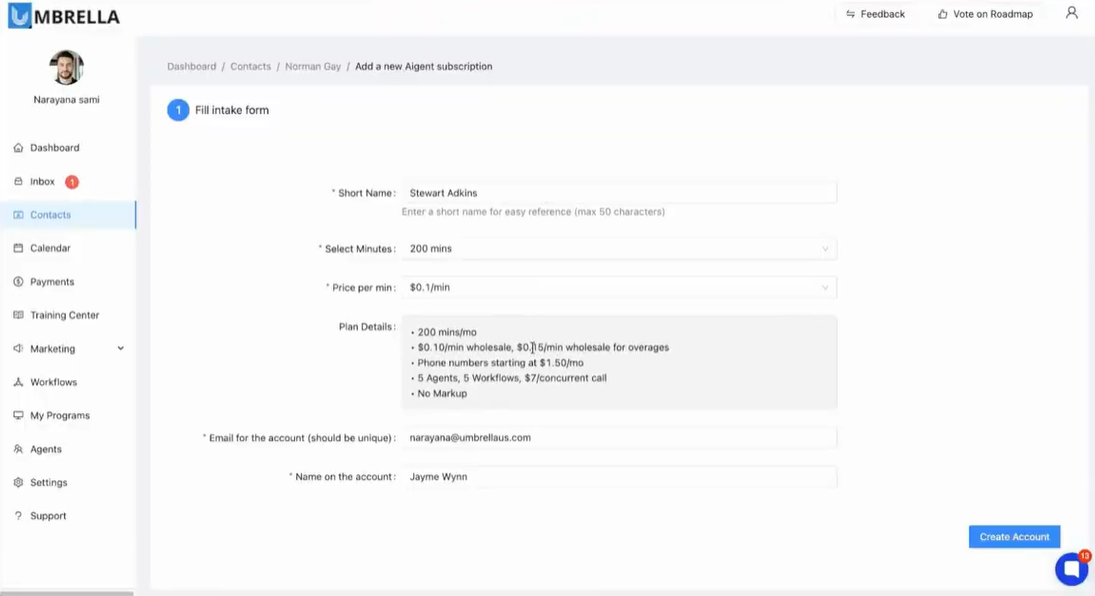
Step 8: In the "Email for the account (should be unique)" field, enter a valid and active email address. This email is crucial as it will be used to create the login for the HubOne Aigent platform and receive all activation and system communications. Afterwards enter the desired name for the account in the "Name on the account" field. This name will be used to identify the agent account within the HubOne platform, appearing in dashboards and reports.

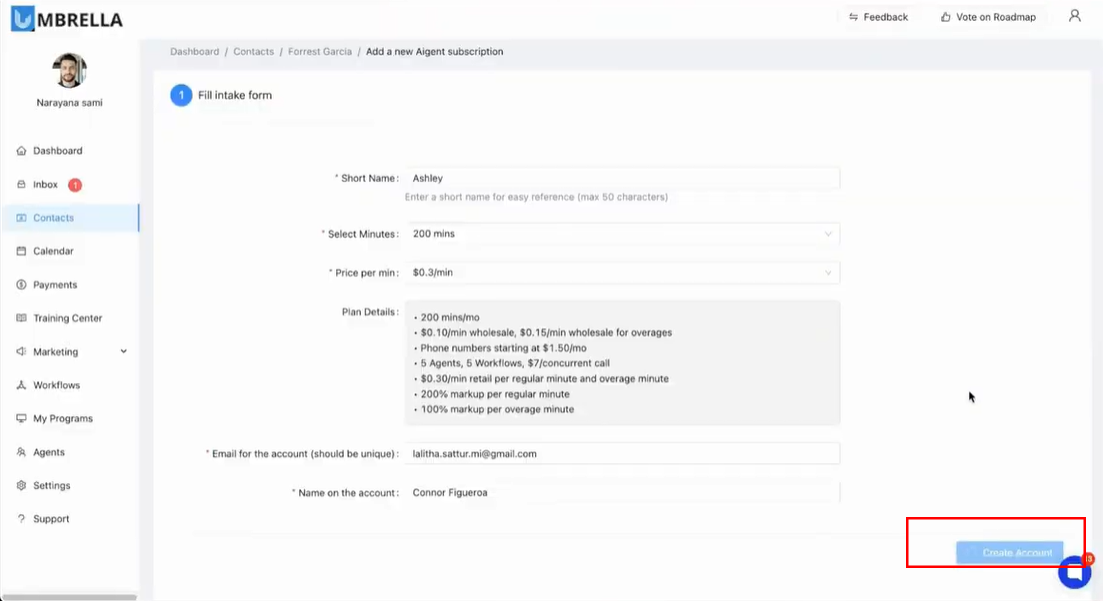
Step 9: After filling in all the required fields and reviewing the plan details, click the blue Create Account button at the bottom of the form. This action submits the configuration and creates the subscription instance under the selected contact.
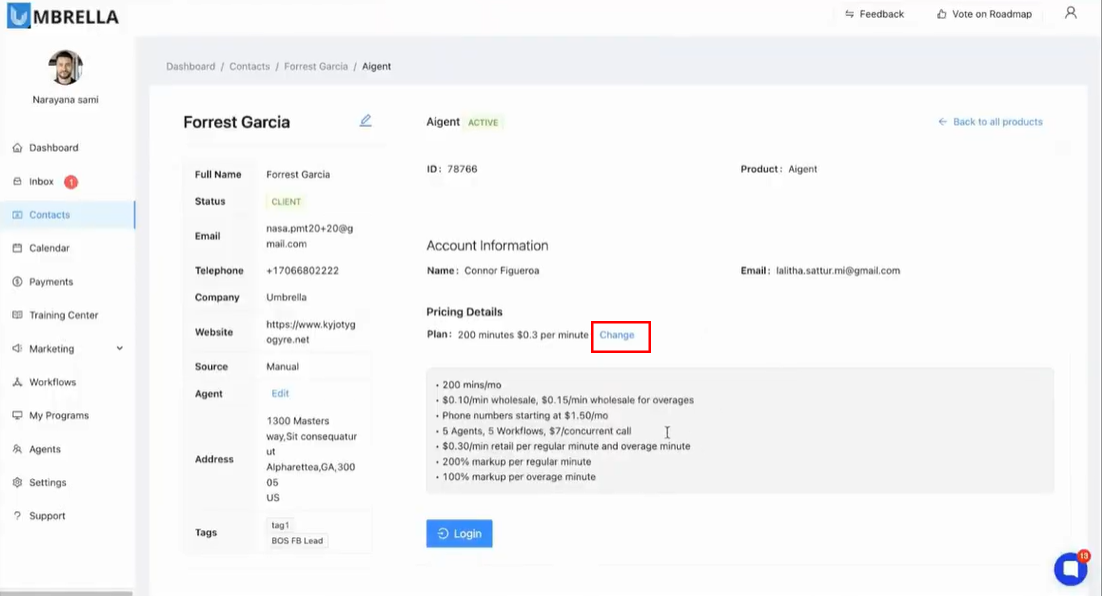
Step 10: Upon successful creation, you will be taken to a product confirmation page within Umbrella that displays all the details of the subscription you just created. This page confirms that the account is active and provides a direct pathway to the agent platform.
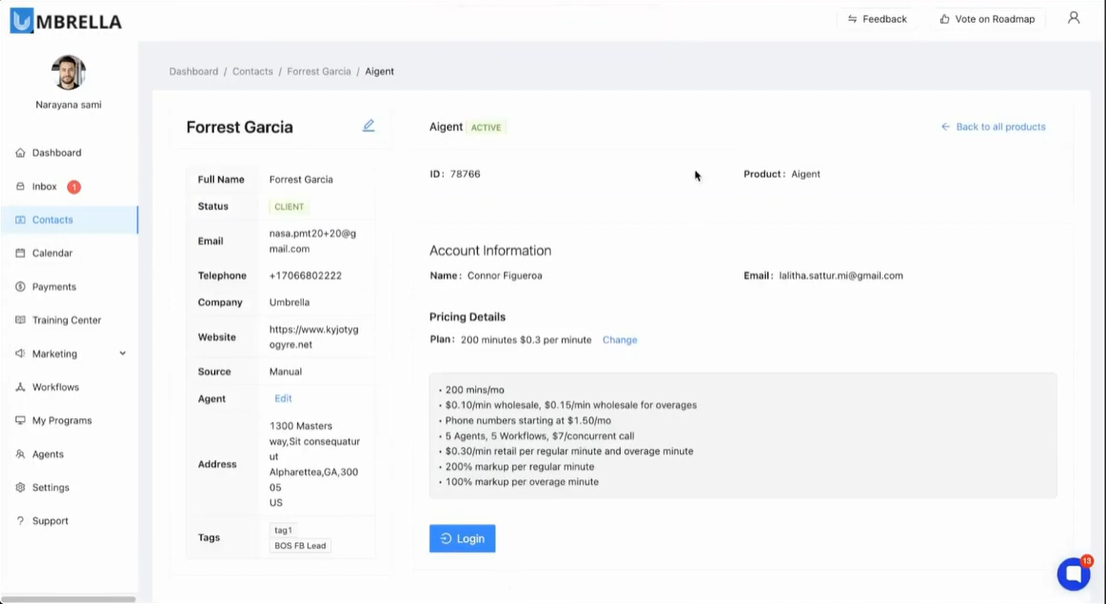
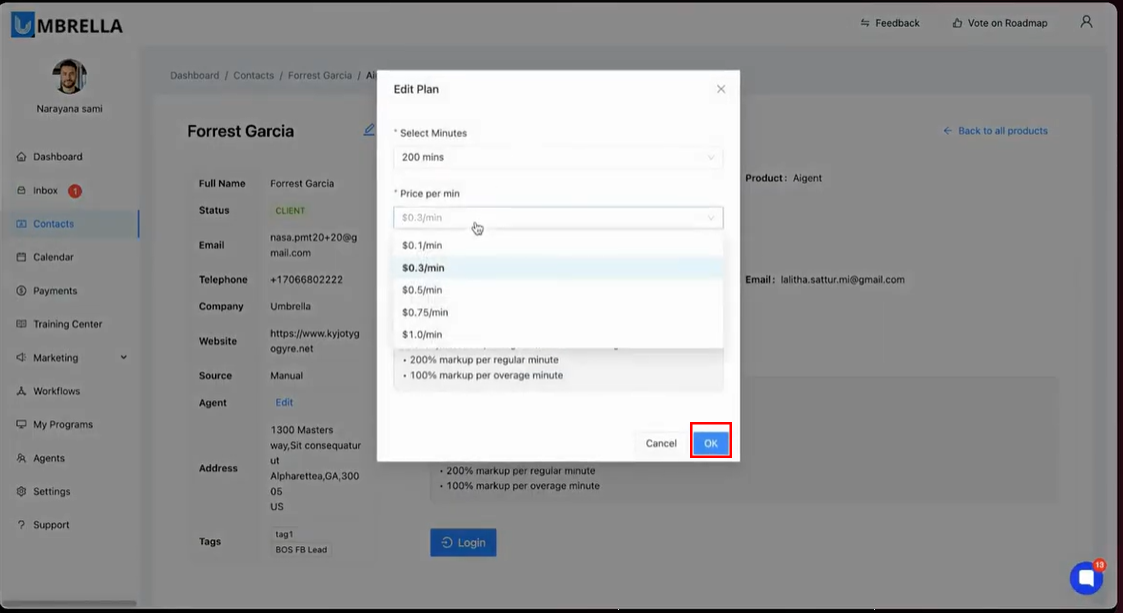
Step 11: Back on the Umbrella product confirmation page, you will see a Change link next to the plan details. Clicking this allows you to modify the subscription at any time. A pop-up window will appear where you can adjust the number of minutes or the price per minute (markup) for the plan.
Step 12: After making any desired modifications in the "Edit Plan" pop-up window, click the OK button to confirm and apply the changes. This will instantly update the subscription's terms and billing structure for future cycles.
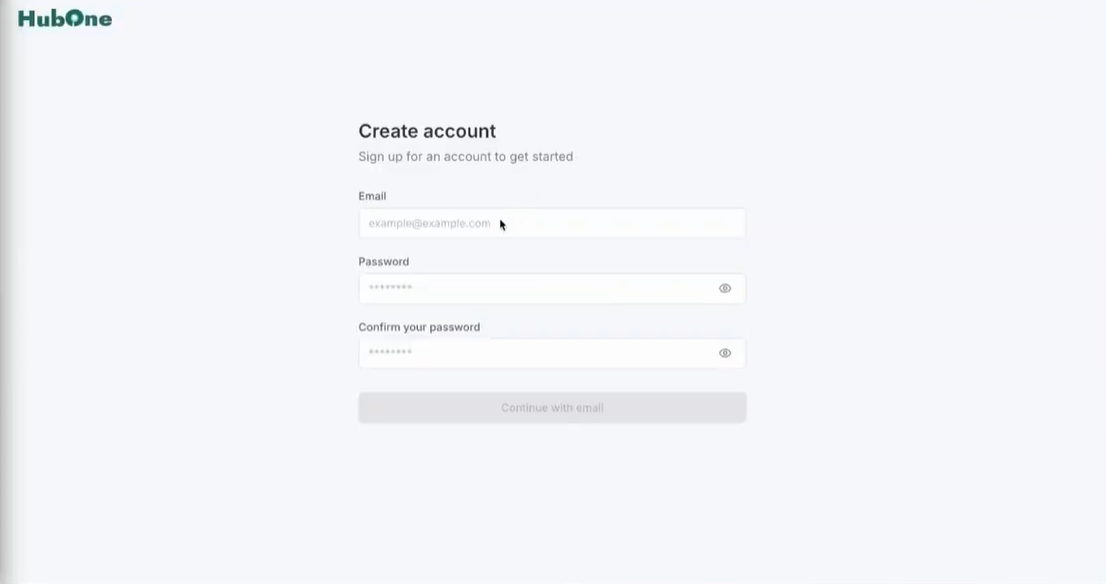
Step 13: Click the blue Login button on the product confirmation page. This action will redirect you away from the Umbrella platform and open the HubOne Aigent account creation portal in a new tab.

Step 14: After being redirected to the HubOne Aigent portal, you will be presented with a "Create account" screen. This is where the end-user will establish their unique credentials to access the AI agent environment.
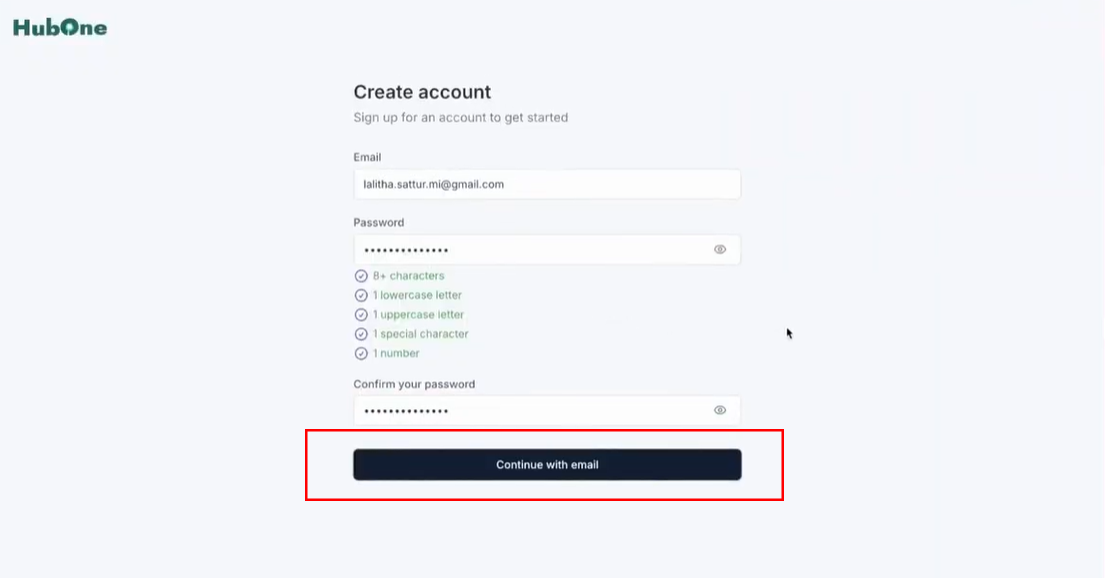
Step 15: On the HubOne "Create account" screen, enter the same email address you registered in Step 9. In the fields below, create and confirm a secure password, following the on-screen requirements for characters, case, and special symbols.
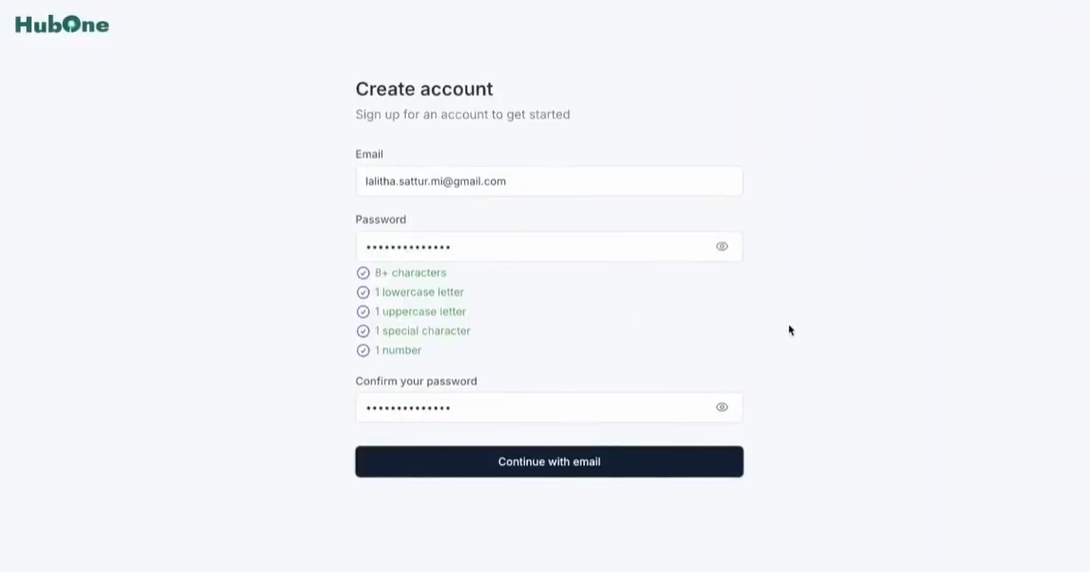
Step 16: Once the email and matching passwords have been entered, click the Continue with email button. The system will then create the user's account, but access will be pending administrative approval to ensure security and proper provisioning.
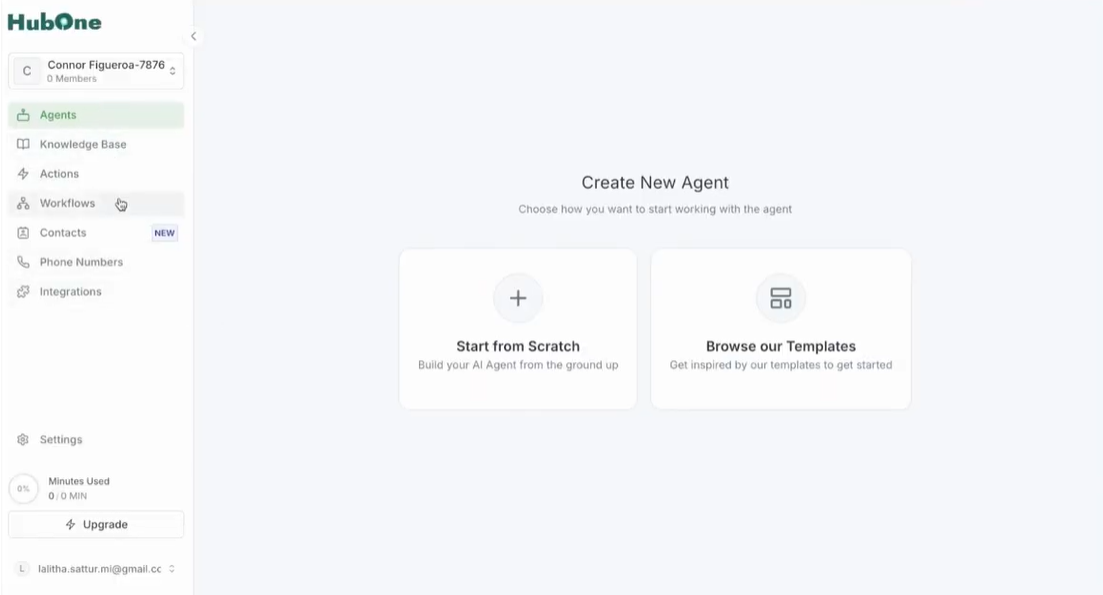
Step 17: After an administrator approves the access request, the user can log in to the HubOne Aigent dashboard. This is the central control panel for building and managing AIgents. Key sections available on the left-hand navigation include Agents, Knowledge Base, Actions, Workflows, Contacts, Phone Numbers, and Settings.
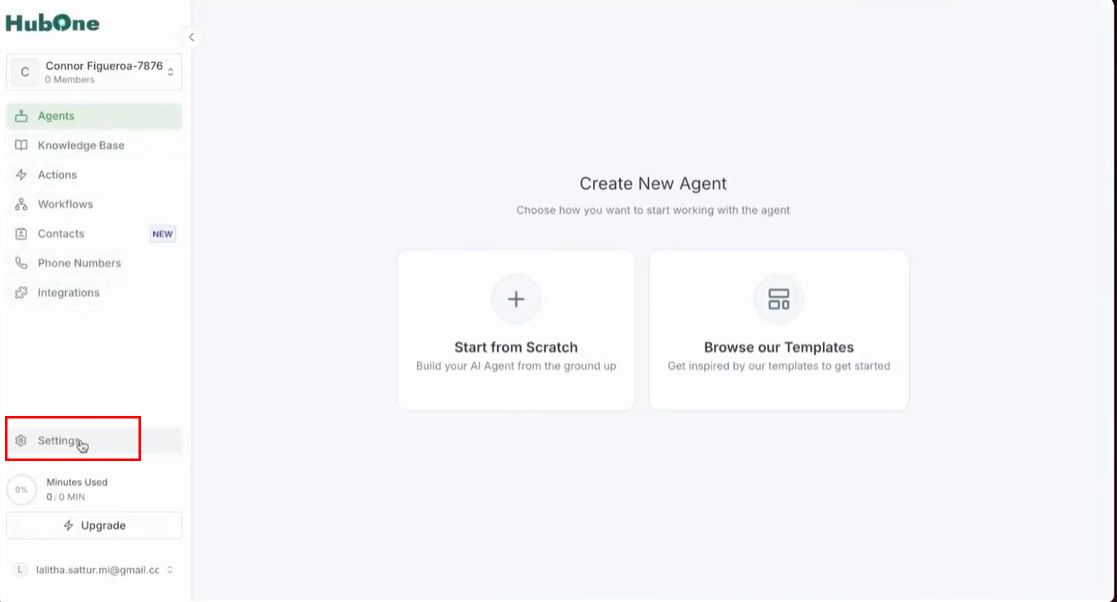
Step 18: To activate the plan and enable all features, navigate to the bottom of the left-hand menu and click on Settings (gear icon). From the settings submenu, select Plan & Billing to manage the subscription and payment information.
Step 19: The Plan and Billing page will display the specific pricing plan that was configured in Umbrella, showing the monthly cost (e.g., $60/mo) and a summary of what's included, such as 200 minutes and 5 agents.
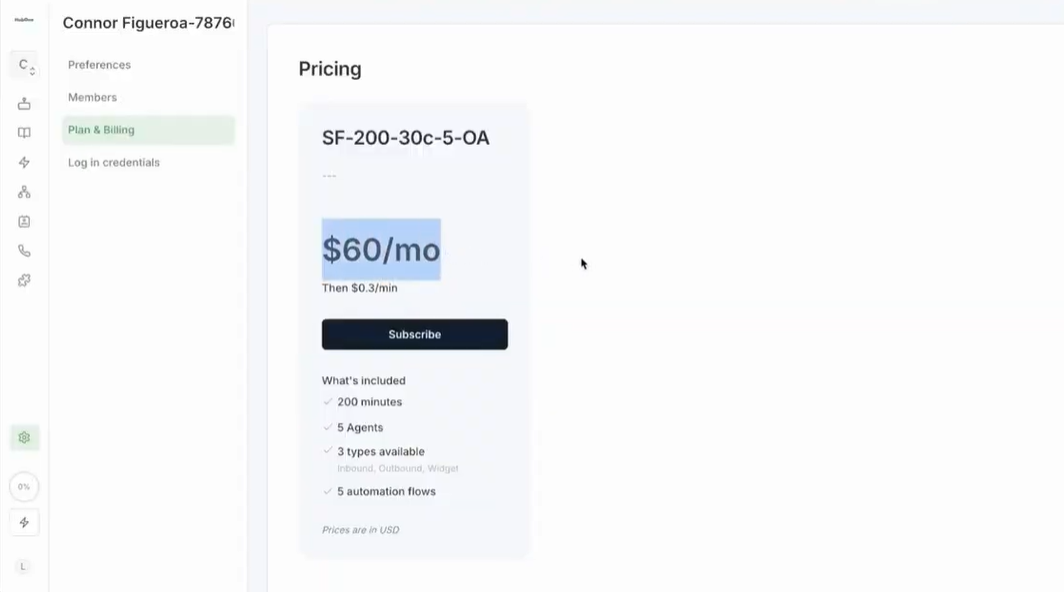
Step 20: Click the Subscribe button on the pricing plan card. You will be redirected to a secure payment page powered by Stripe, where you or your customer can enter payment information to activate the monthly subscription.
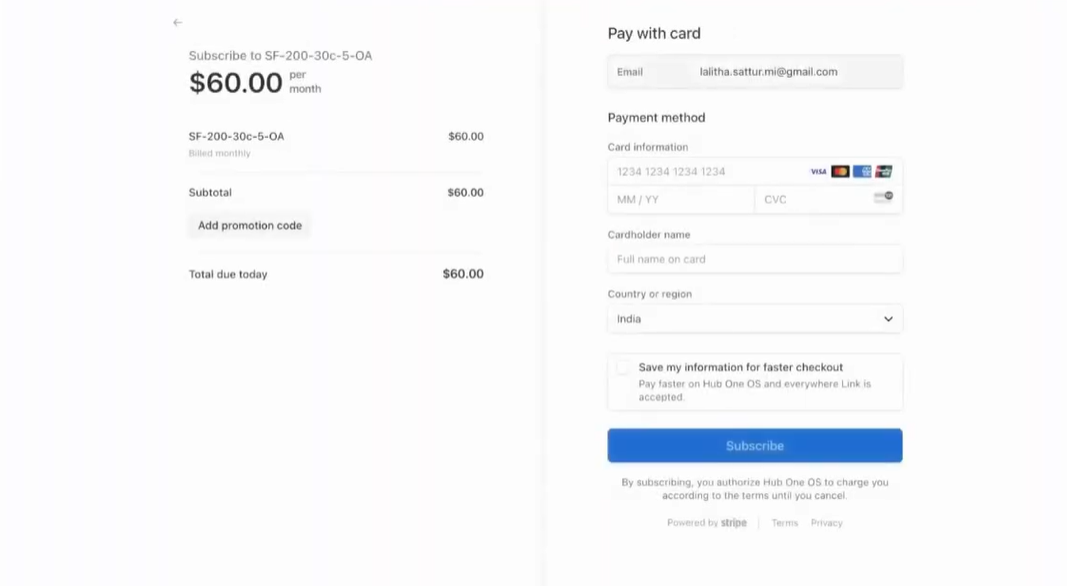
Step 21: On the Stripe page, fill in the email, card information, and other required details. Once all information is entered correctly, click the final Subscribe button to process the payment and officially start the subscription.

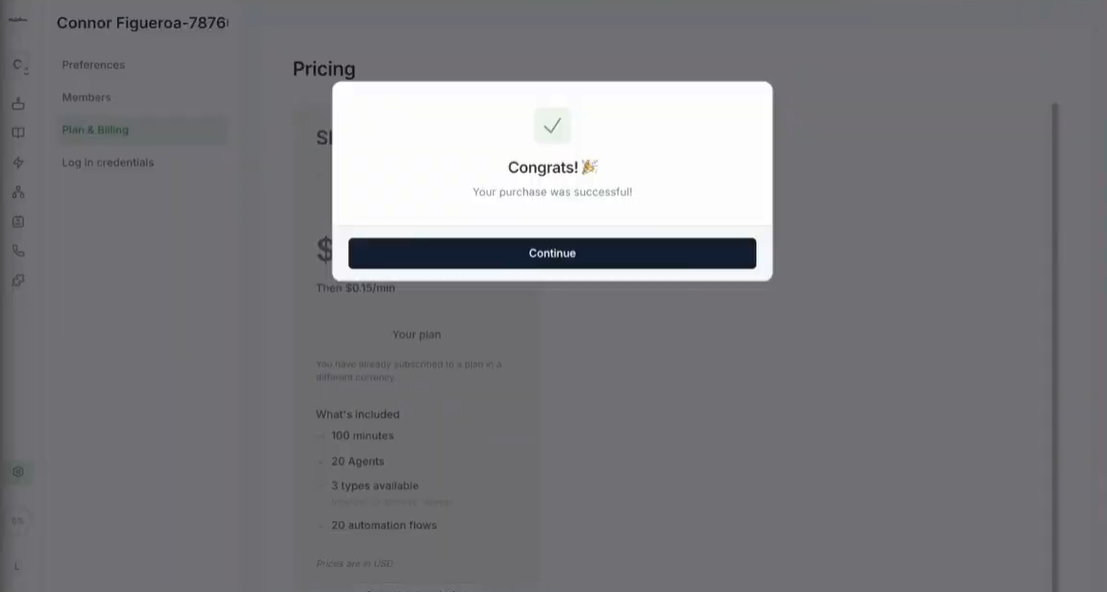
Step 22: After the payment is successfully processed, a pop-up window will appear with a "Congrats! Your purchase was successful!" message. Click the Continue button to close the pop-up and return to your fully activated dashboard.
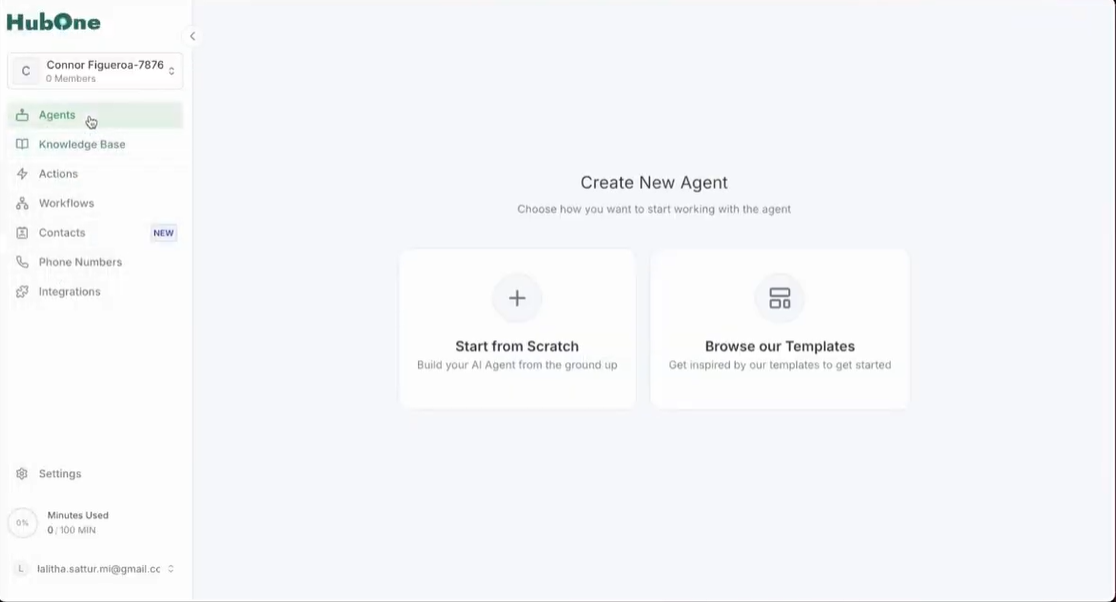
Step 23: Now that the subscription is active, all features are unlocked. The main dashboard will prompt you to get started by either building an AIgent from scratch or browsing available templates. You can now access all sections to create agents, purchase phone numbers, and build knowledge bases.
Step 26: The entire setup process is complete. The account is fully provisioned, billing is active, and the user has secure access to the HubOne Aigent platform.
Step 27: You can now proceed with the operational tasks of building your AIgent. Navigate to the Agents section to create new agents, the Phone Numbers section to purchase and assign numbers, and the Knowledge Base section to upload documents and provide context for your bot.
