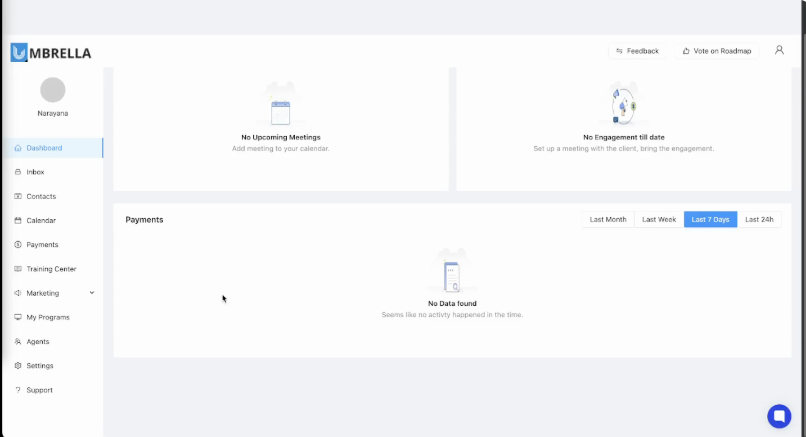
Step 1:First, log in to your Umbrella account and navigate to the Contacts section from the left-hand menu. When you purchase an Agent 360 subscription, the system automatically creates a special contact named Prospecting Agent in your list. This contact is the gateway to accessing and managing your AI agent's subscription and features.

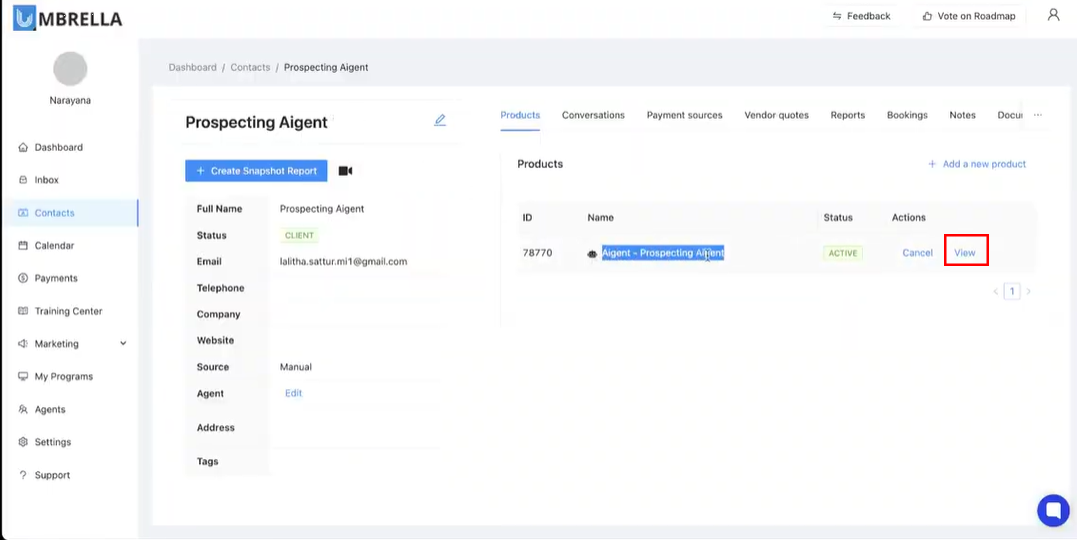
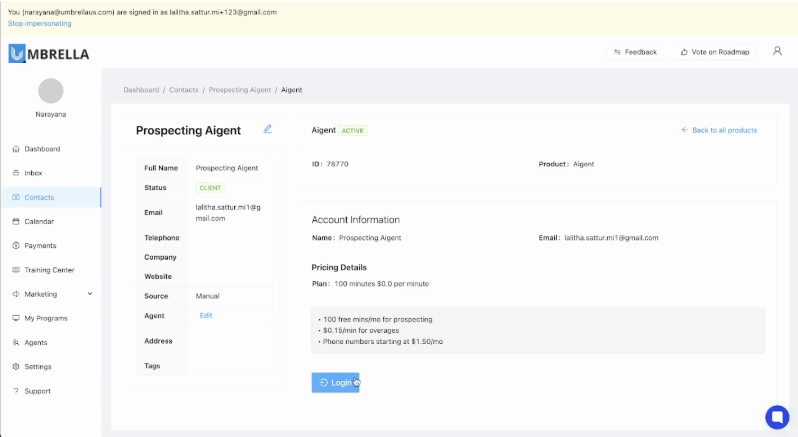
Step 2: Click on the Prospecting Agent contact to open its detailed view. Here, you will see a Products tab where your Agent - Prospecting Agent subscription is listed. Click the View button to see your plan details, which confirms the 100 free minutes per month. From this screen, click the Login button. You will be redirected to the HubOne portal in a new browser tab to create your dedicated agent account.
Step 3: Secure your agent portal by logging in with the same email you used for your Umbrella subscription. In the agent portal tab, enter your subscription email in the Email field to link your agent account to your user credentials
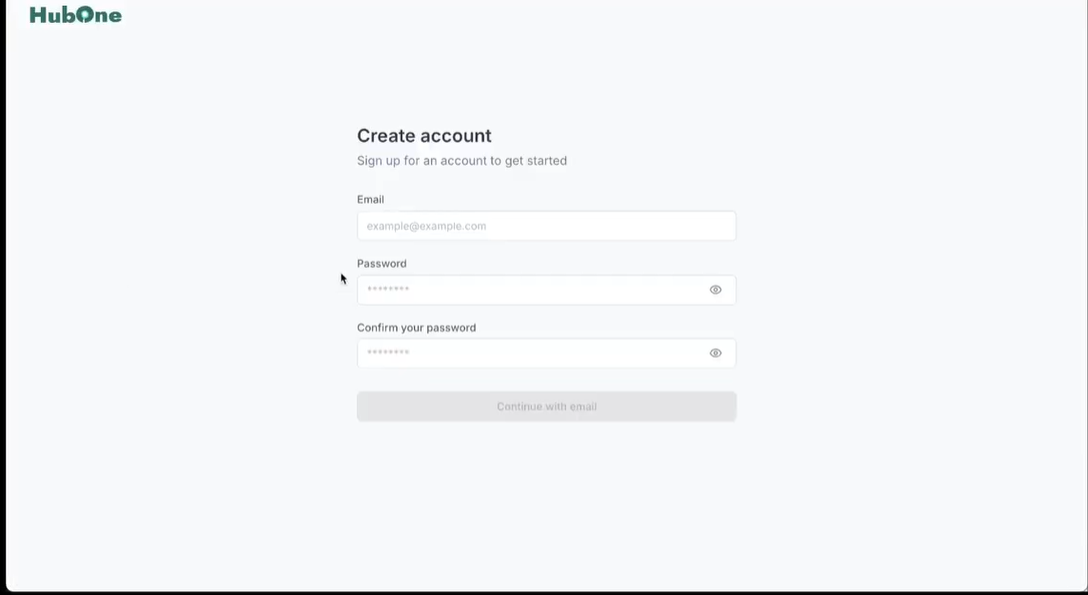

Step 4: Once prompted, create your account password by entering it in both the New Password and Confirm Password fields. Make sure to follow any password requirements listed (such as minimum character count or complexity), then submit to proceed.
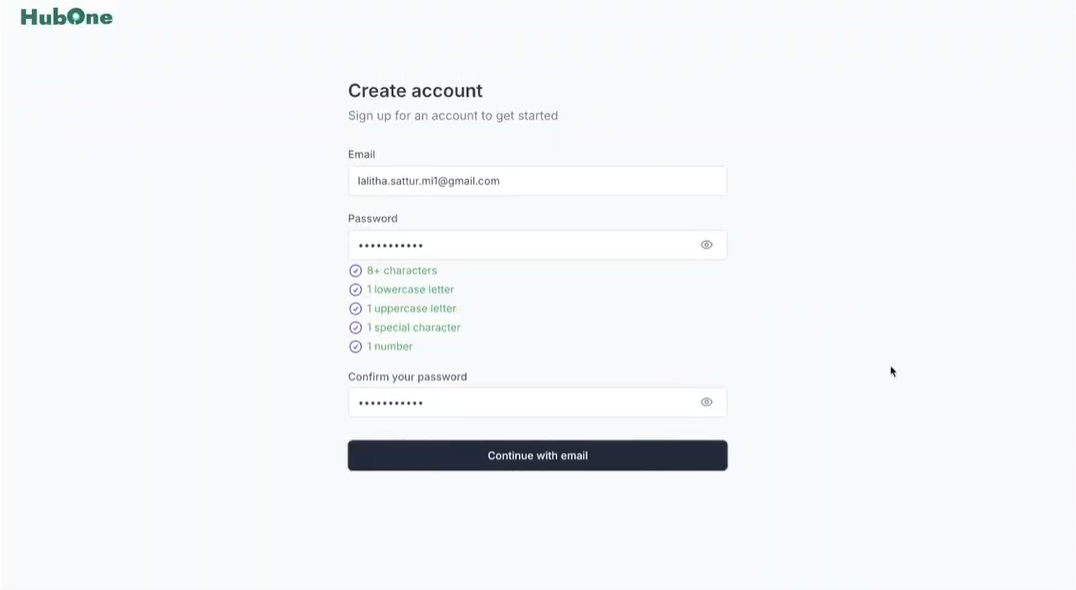
Step 5: To move forward, click the Continue with Email button. This will mark your account status as "Access Requested" and notify the Umbrella team to activate your access. You’ll receive a message, either by email or within the platform, once your account has been approved and is ready to use.

Step 6: Once you receive the approval email or see a confirmation message in the platform, refresh your browser. You should now see your agent dashboard, confirming that your account is active and ready to use.
Step 7: Go to plan settings In your agent dashboard, head to Settings from the main menu. You’ll see a list of available plans, including the free plan that gives you 100 AI agent minutes each month. This confirms that you're eligible before subscribing.
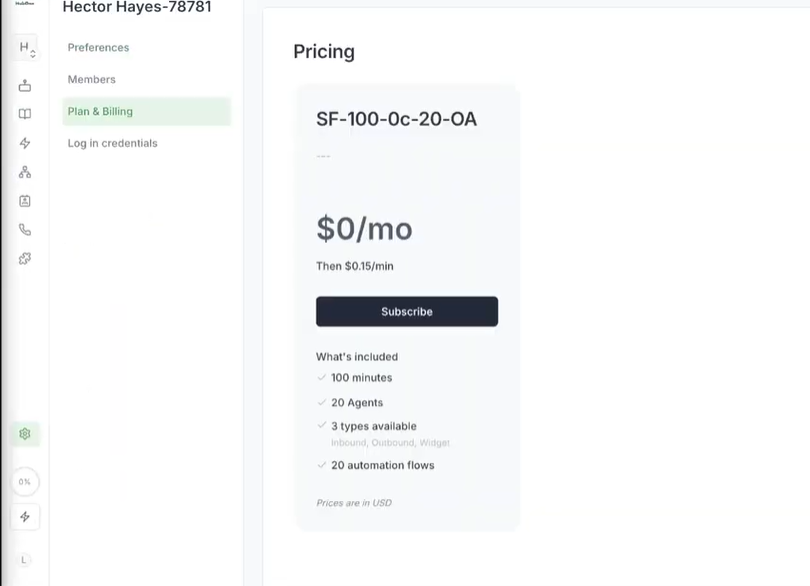
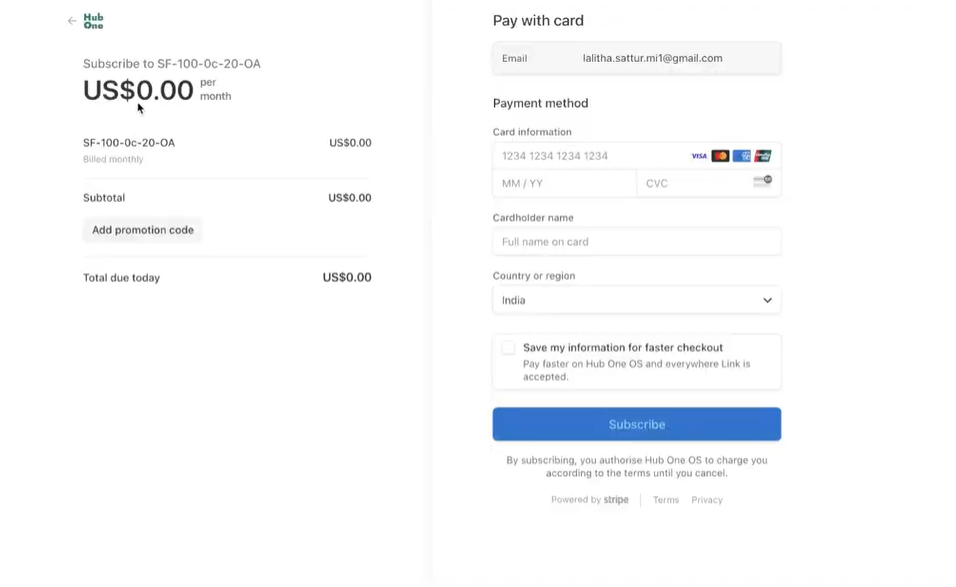
Step 8: Subscribe to the free plan On the plan selection page, find the free plan and click Subscribe. You’ll be redirected to Stripe, our secure payment processor.
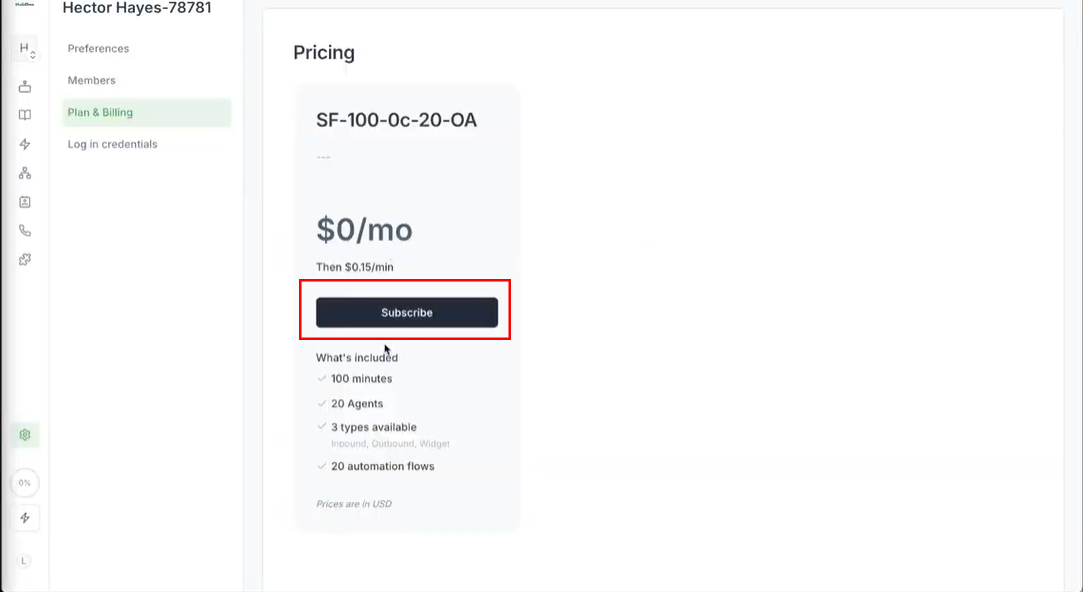
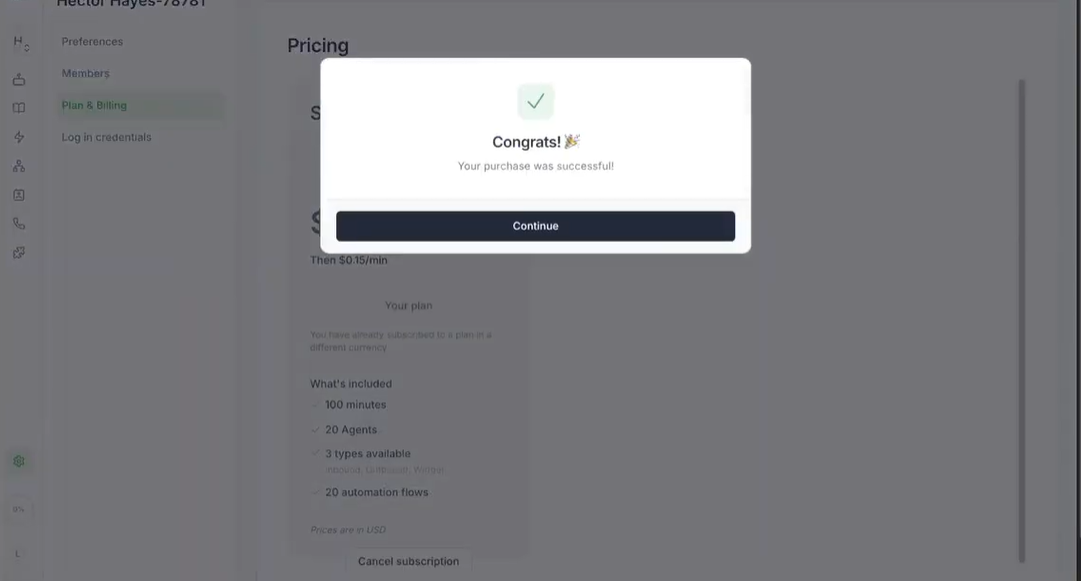
Step 9: Complete Stripe checkout for activation. Even though the plan is free, you’ll need to enter a valid credit card in Stripe to activate the subscription (this covers any future charges like extra minutes or phone numbers). Once submitted, you’ll see a confirmation message or a “Subscription Active” status in your dashboard
Step 10: Confirm subscription activation. Back in your Settings or dashboard, double-check that your free plan now shows as “Active.” This means your subscription setup is complete.
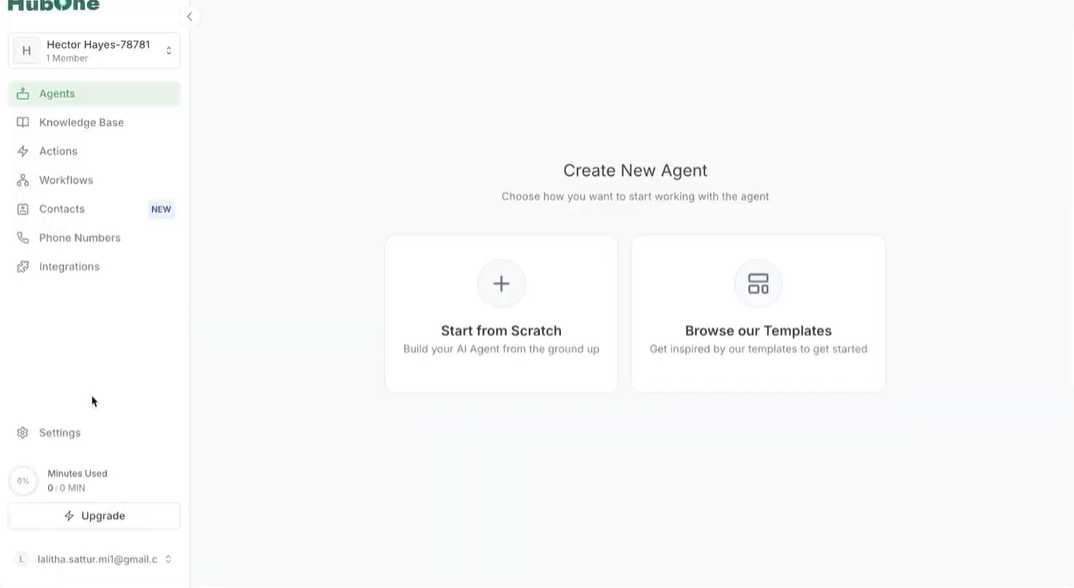
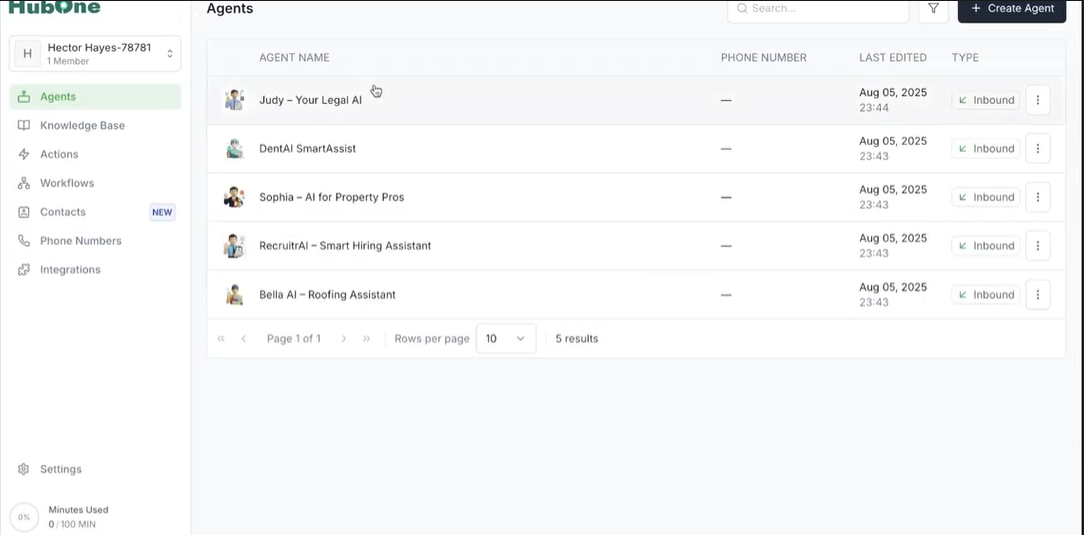
Step 11: Access the Agents section and see available agents from the main menu, go to the Agents section to view the agents available to you under the free plan. You’ll see a list of agents ready to be assigned and start working.
Step 12: Assign phone numbers to agents. Click on an agent and look for the option to assign a phone number (usually labeled something like Assign Number). Follow the prompts to either choose or purchase a number. Once set, your agent will be fully enabled to make and receive calls automatically.
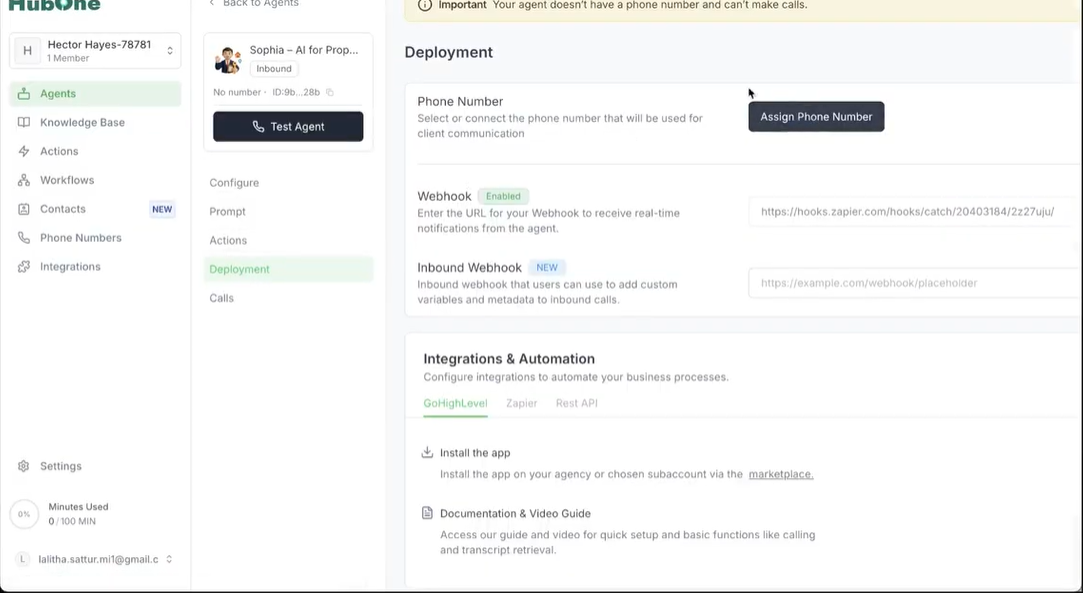
Once the assignment’s done, your AI agents are live. Deploy them on your website or invite customers to call in so they experience lead qualification powered by Umbrella’s automation.
