Connecting Your Google Calendar
You can connect your external Google Calendar for two-way synchronization:
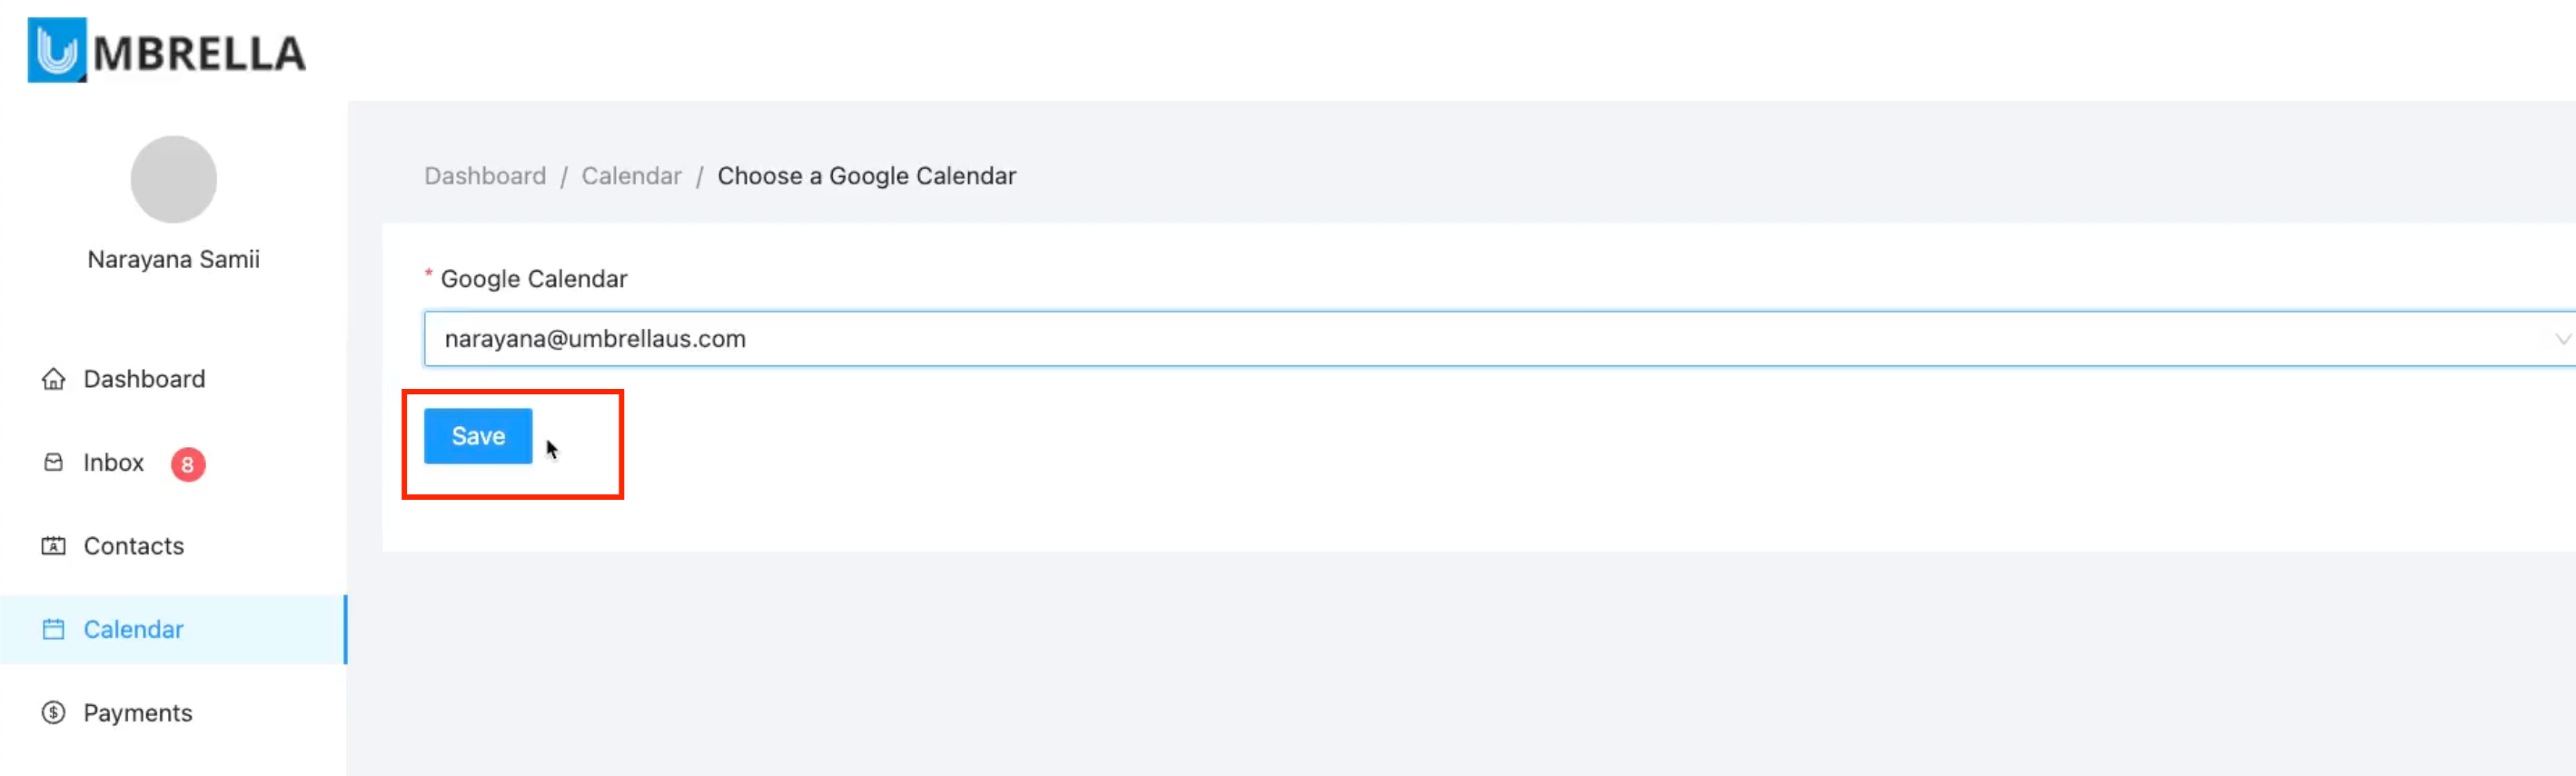
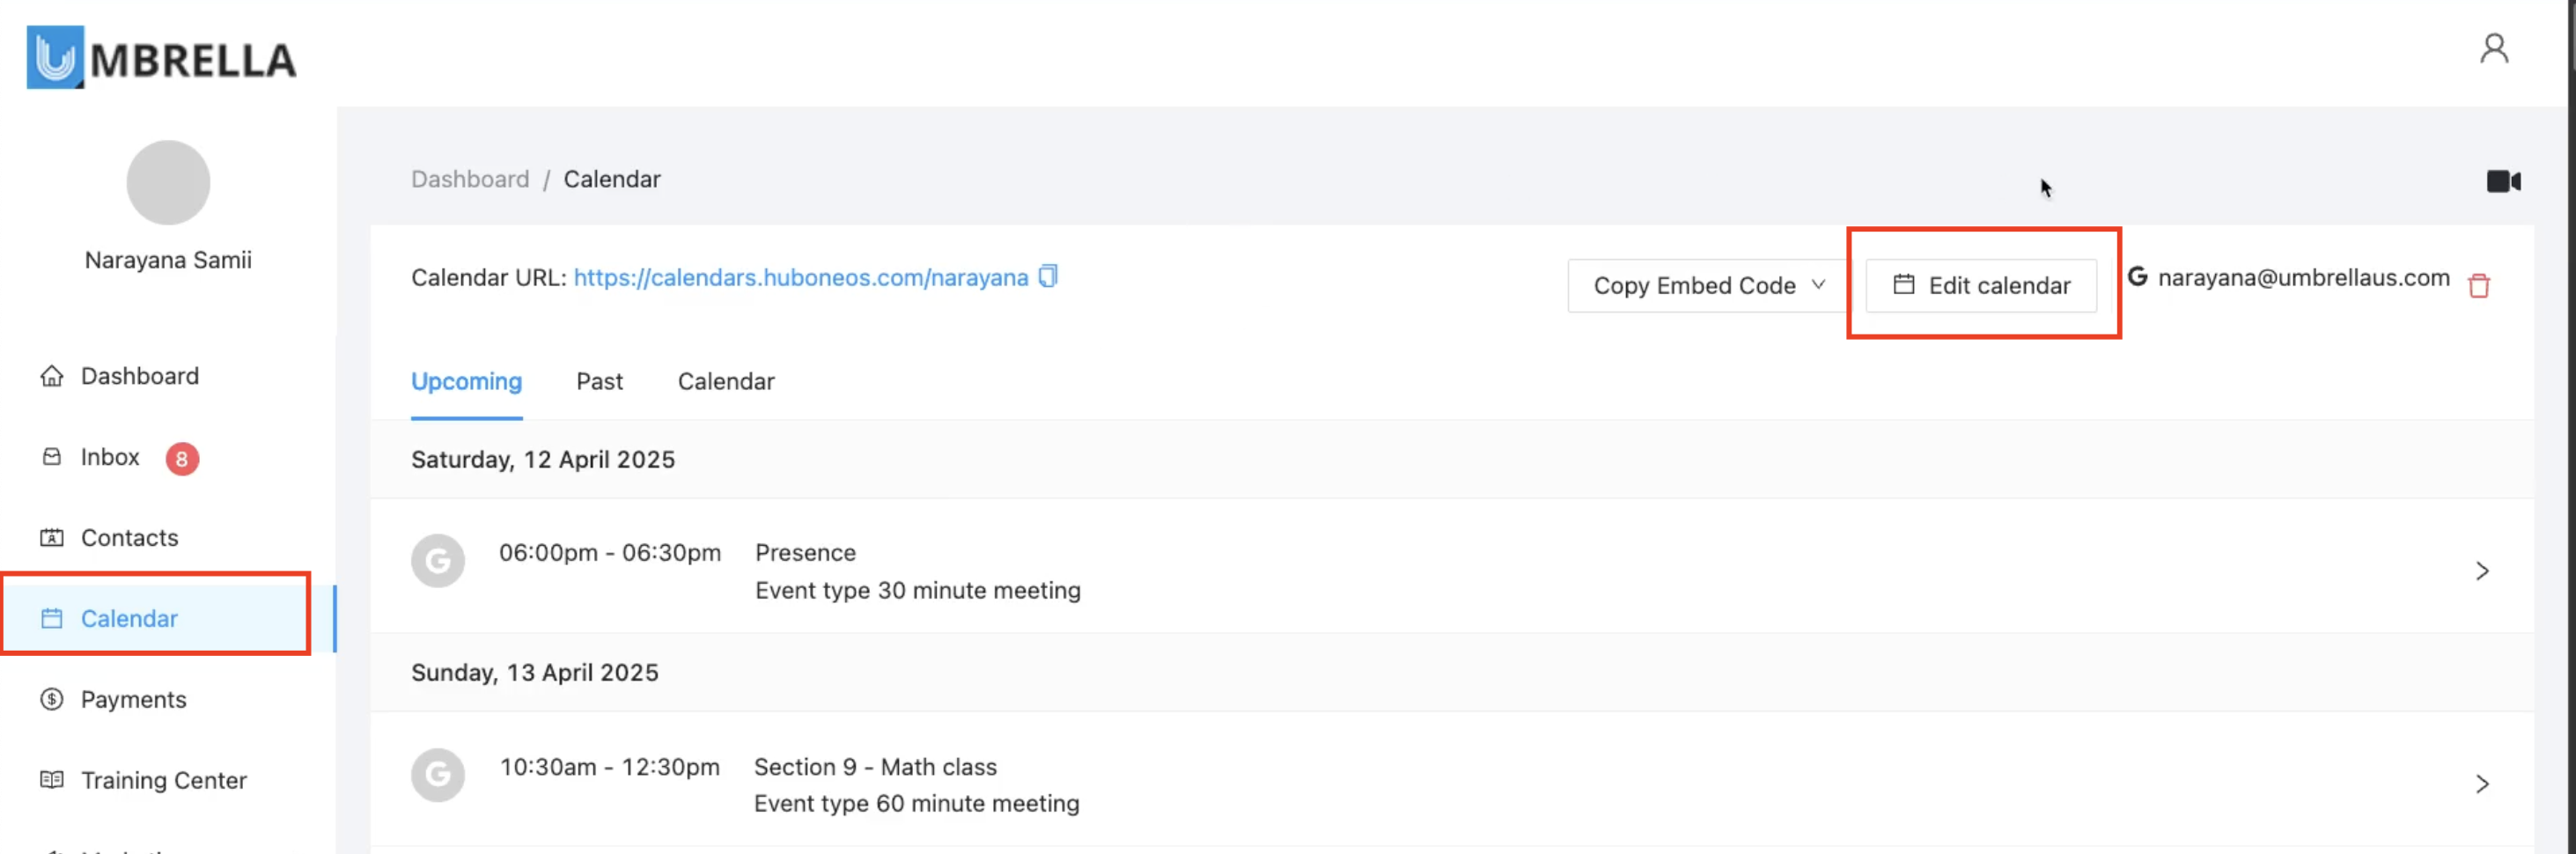
Go to the Calendar section.
Look for the Connect Google Calendar button (if not connected) or your connected Google email address (if already connected) near the top right.
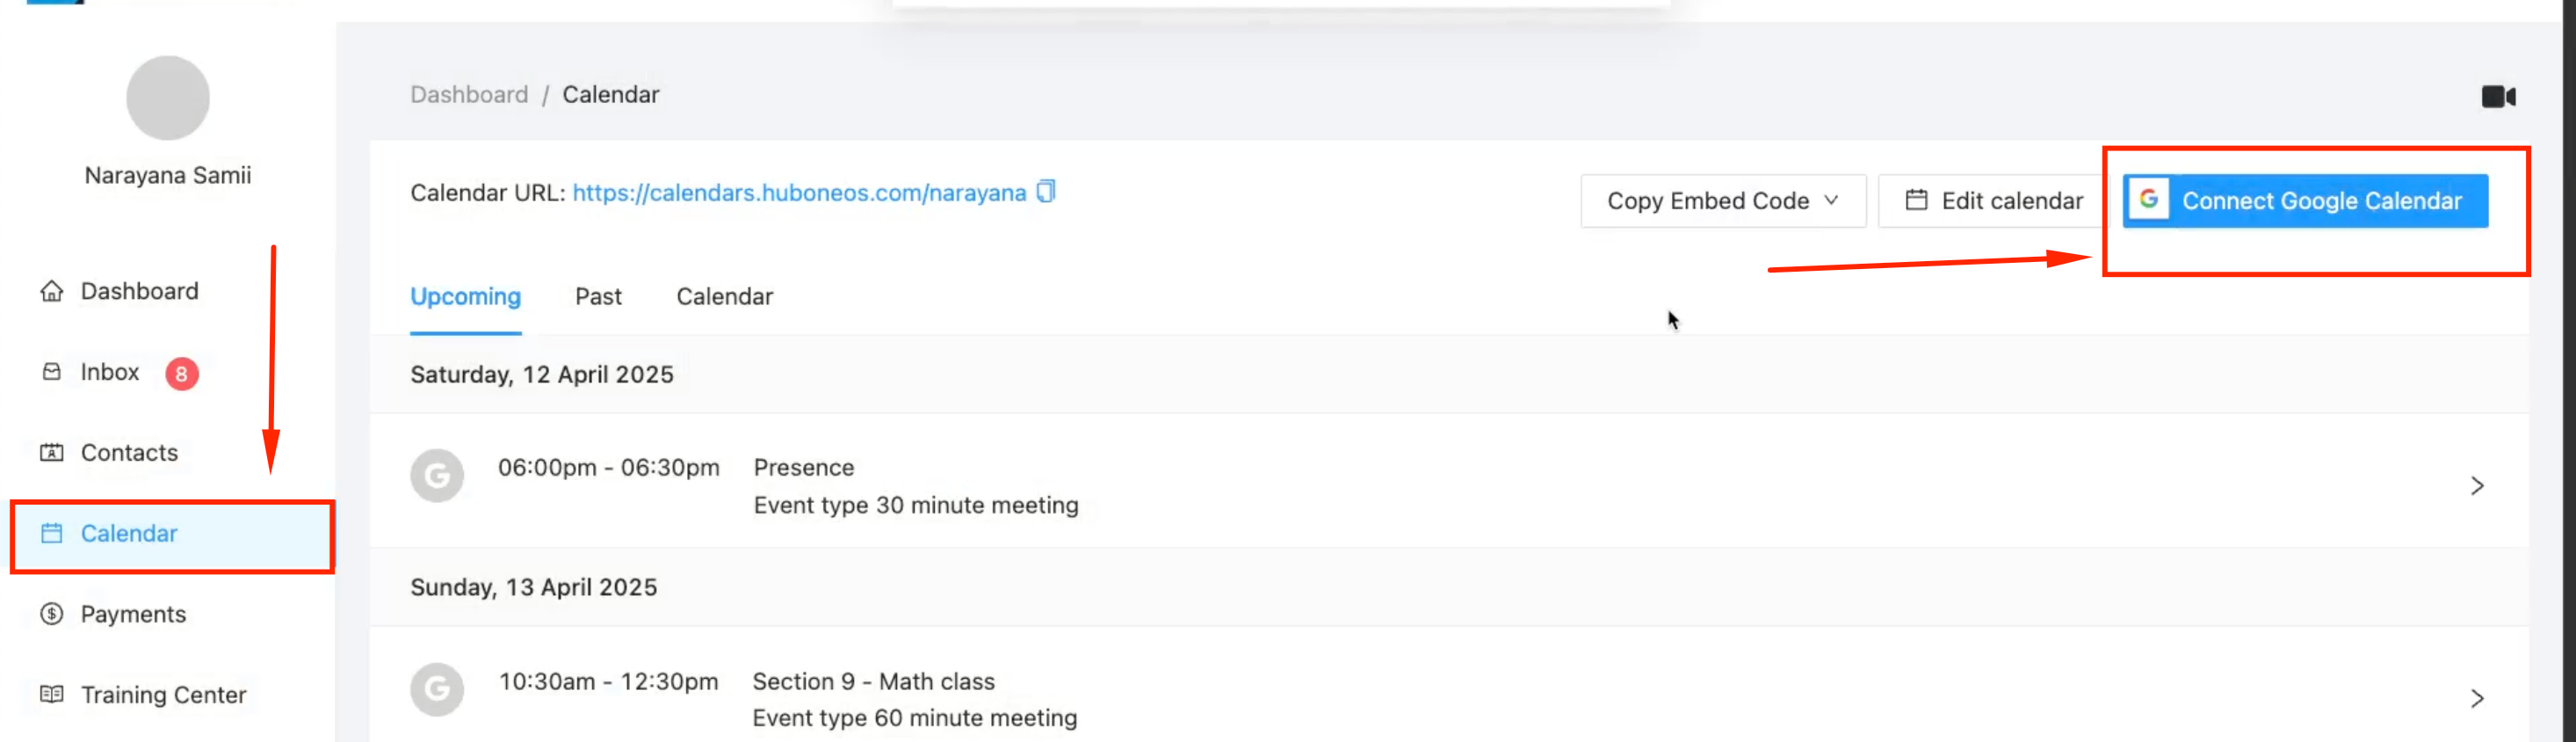
Click the button/link.
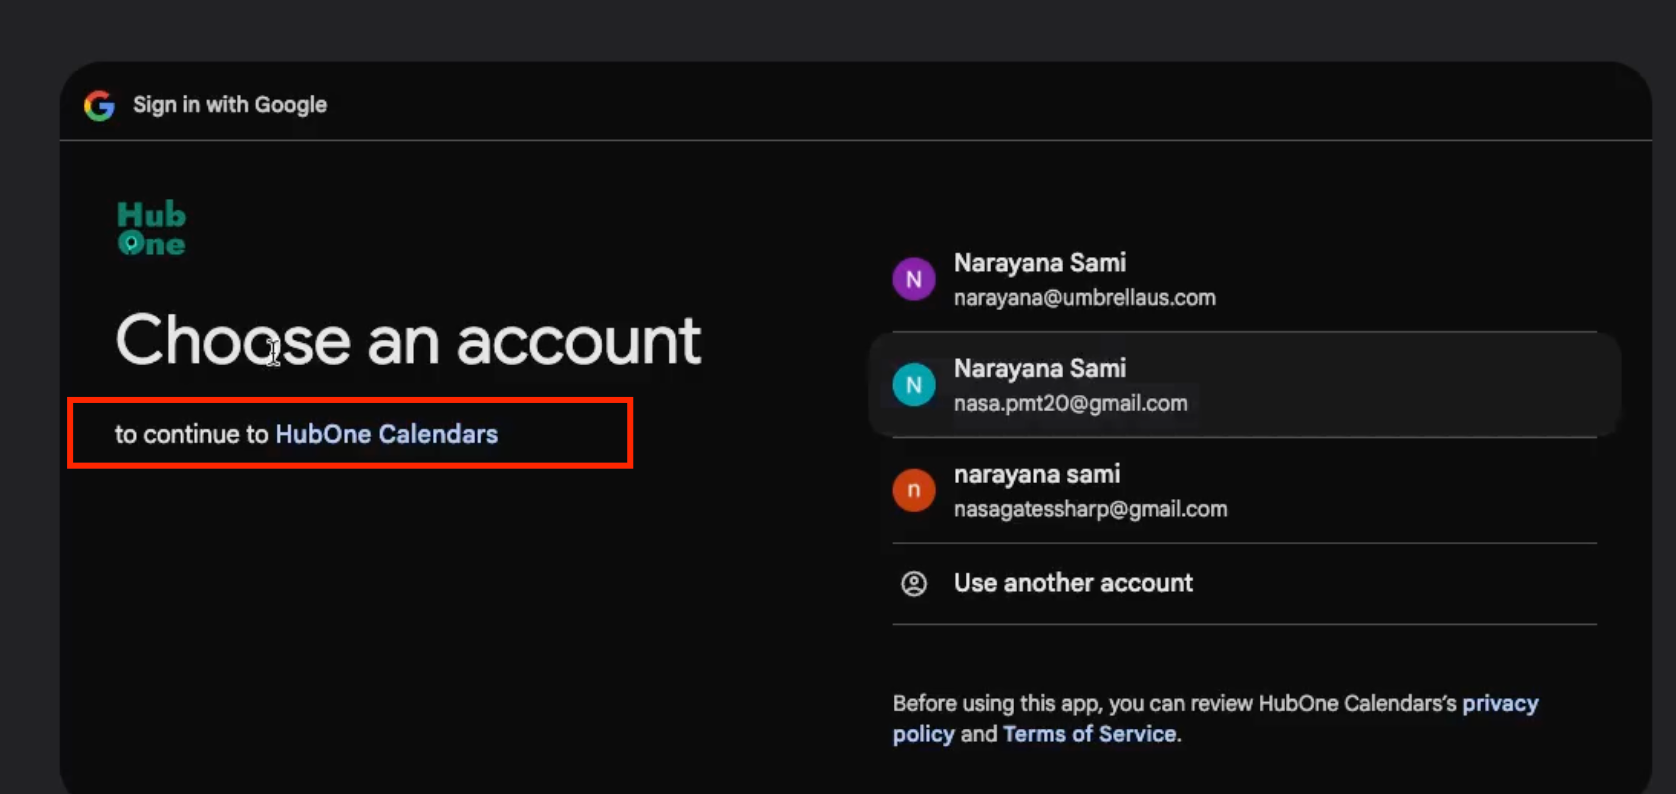
Follow the Google sign-in and permission prompts (you'll see the HubOne branding).

Choose the specific Google Calendar you want to sync from the dropdown.
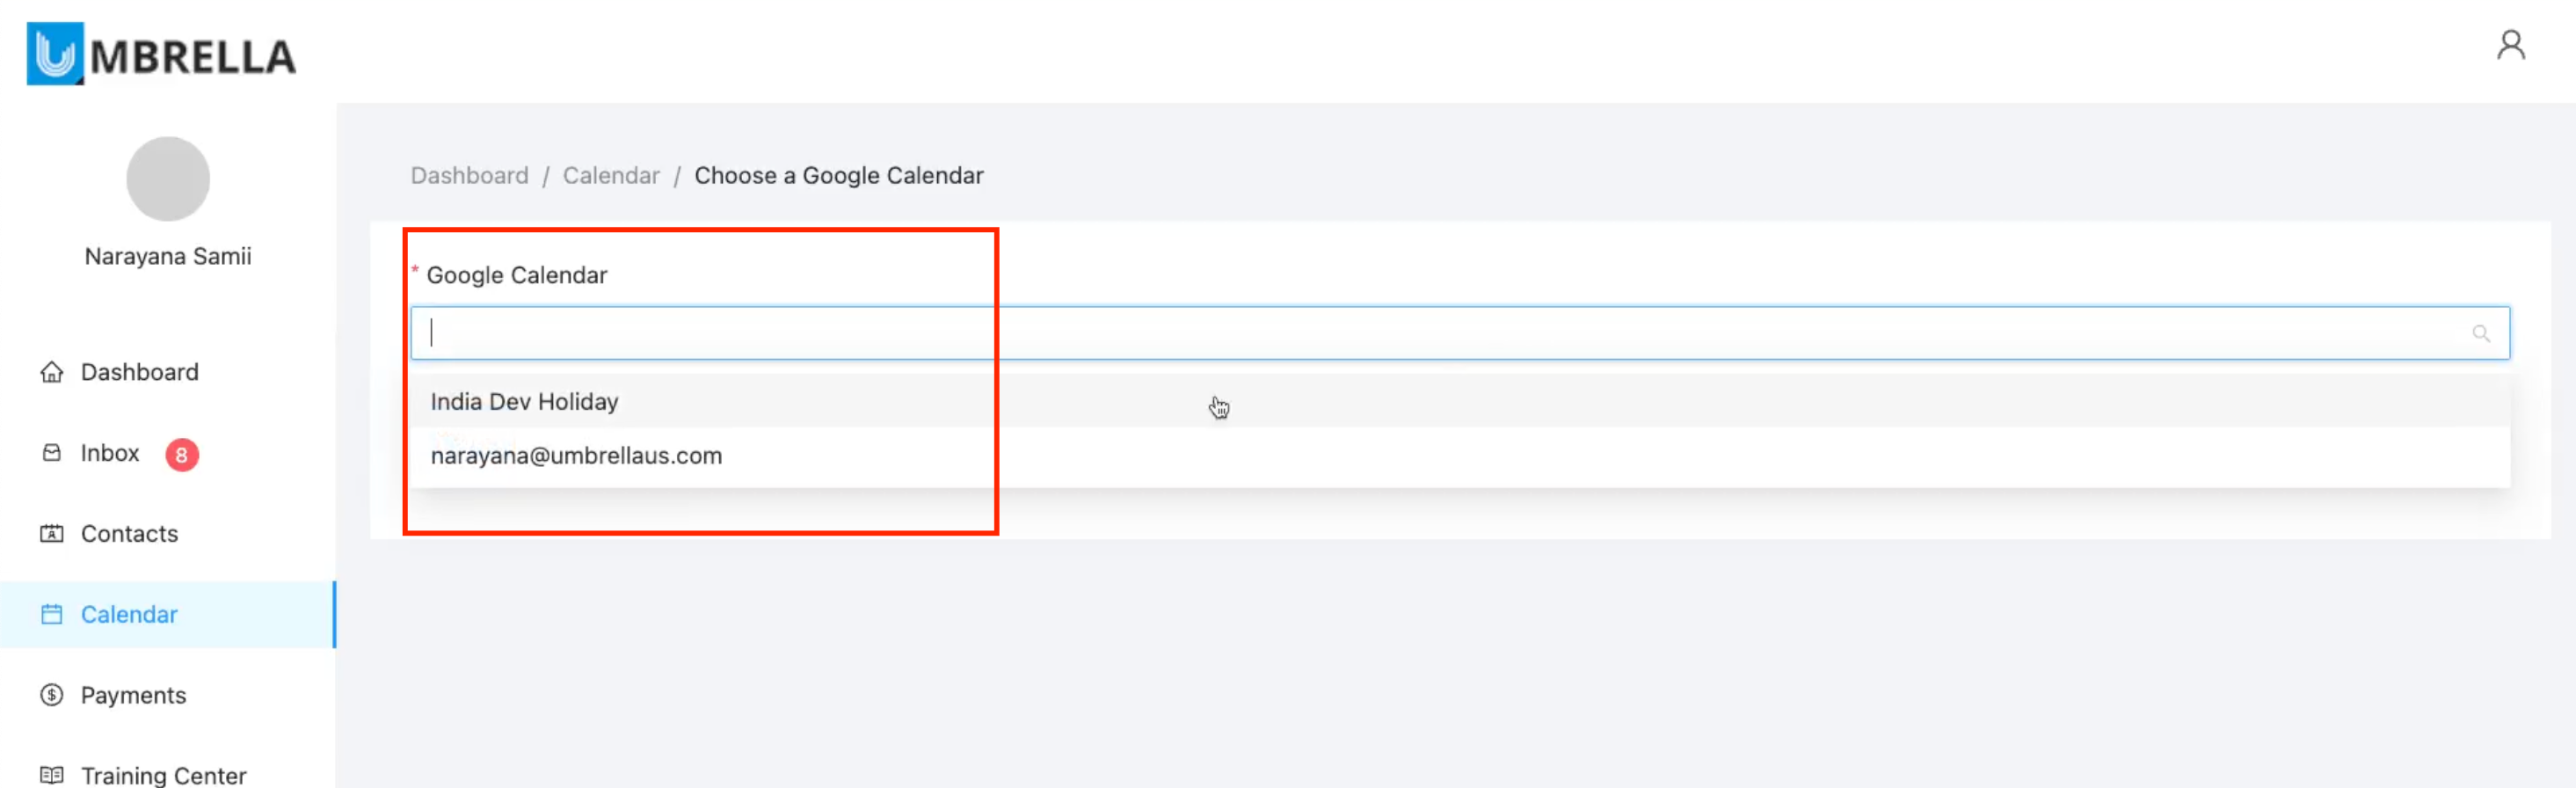
Click Save.
To disconnect, click the Trash can icon next to your connected Google email address and confirm.
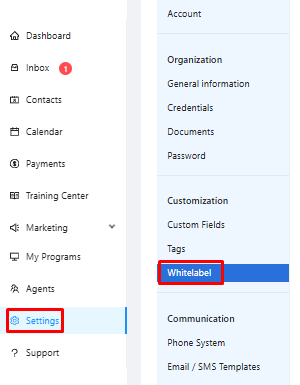
White-Labeling the calendar URL:
To customize your calendar URL navigate to White-Label Settings inside your Umbrella Dashboard:
You have two options for connecting a domain:
Purchase a New Domain: If you don't have a domain, you can click on Purchase a Domain, which will take you to the store where you can buy one.
Connect an Existing Domain: If you already own a domain, select Connect a Domain. Enter your parent domain (e.g., example.com) without any subdomains and click Connect Domain.
Once you connect your domain, you will see options to configure the subdomain for the calendar:
Calendar: e.g., calendar.yourdomain.com
A notification will appear stating that DNS Configuration is Required. You must configure your DNS records within 15 days, or the domain will be removed from your account:
View DNS Details: Click on Show Details to see the required DNS records.
Create CNAME Records: In your domain registrar's DNS management panel, create a CNAME record for each subdomain listed.
Point to Target DNS: Point each CNAME record to the corresponding target DNS provided in the DNS configuration details.
Verifying the Setup
Sync DNS Status: Back in the white-label settings, click on Sync DNS Status. This will check if your DNS changes have been successfully propagated.
Check the Status: The status next to each subdomain will change from Not Set to Live once the configuration is complete. This process may take a few minutes.
Test Your Custom Domain: To test the setup, open a browser and navigate to one of your new subdomains. You should see your custom page with your logo.
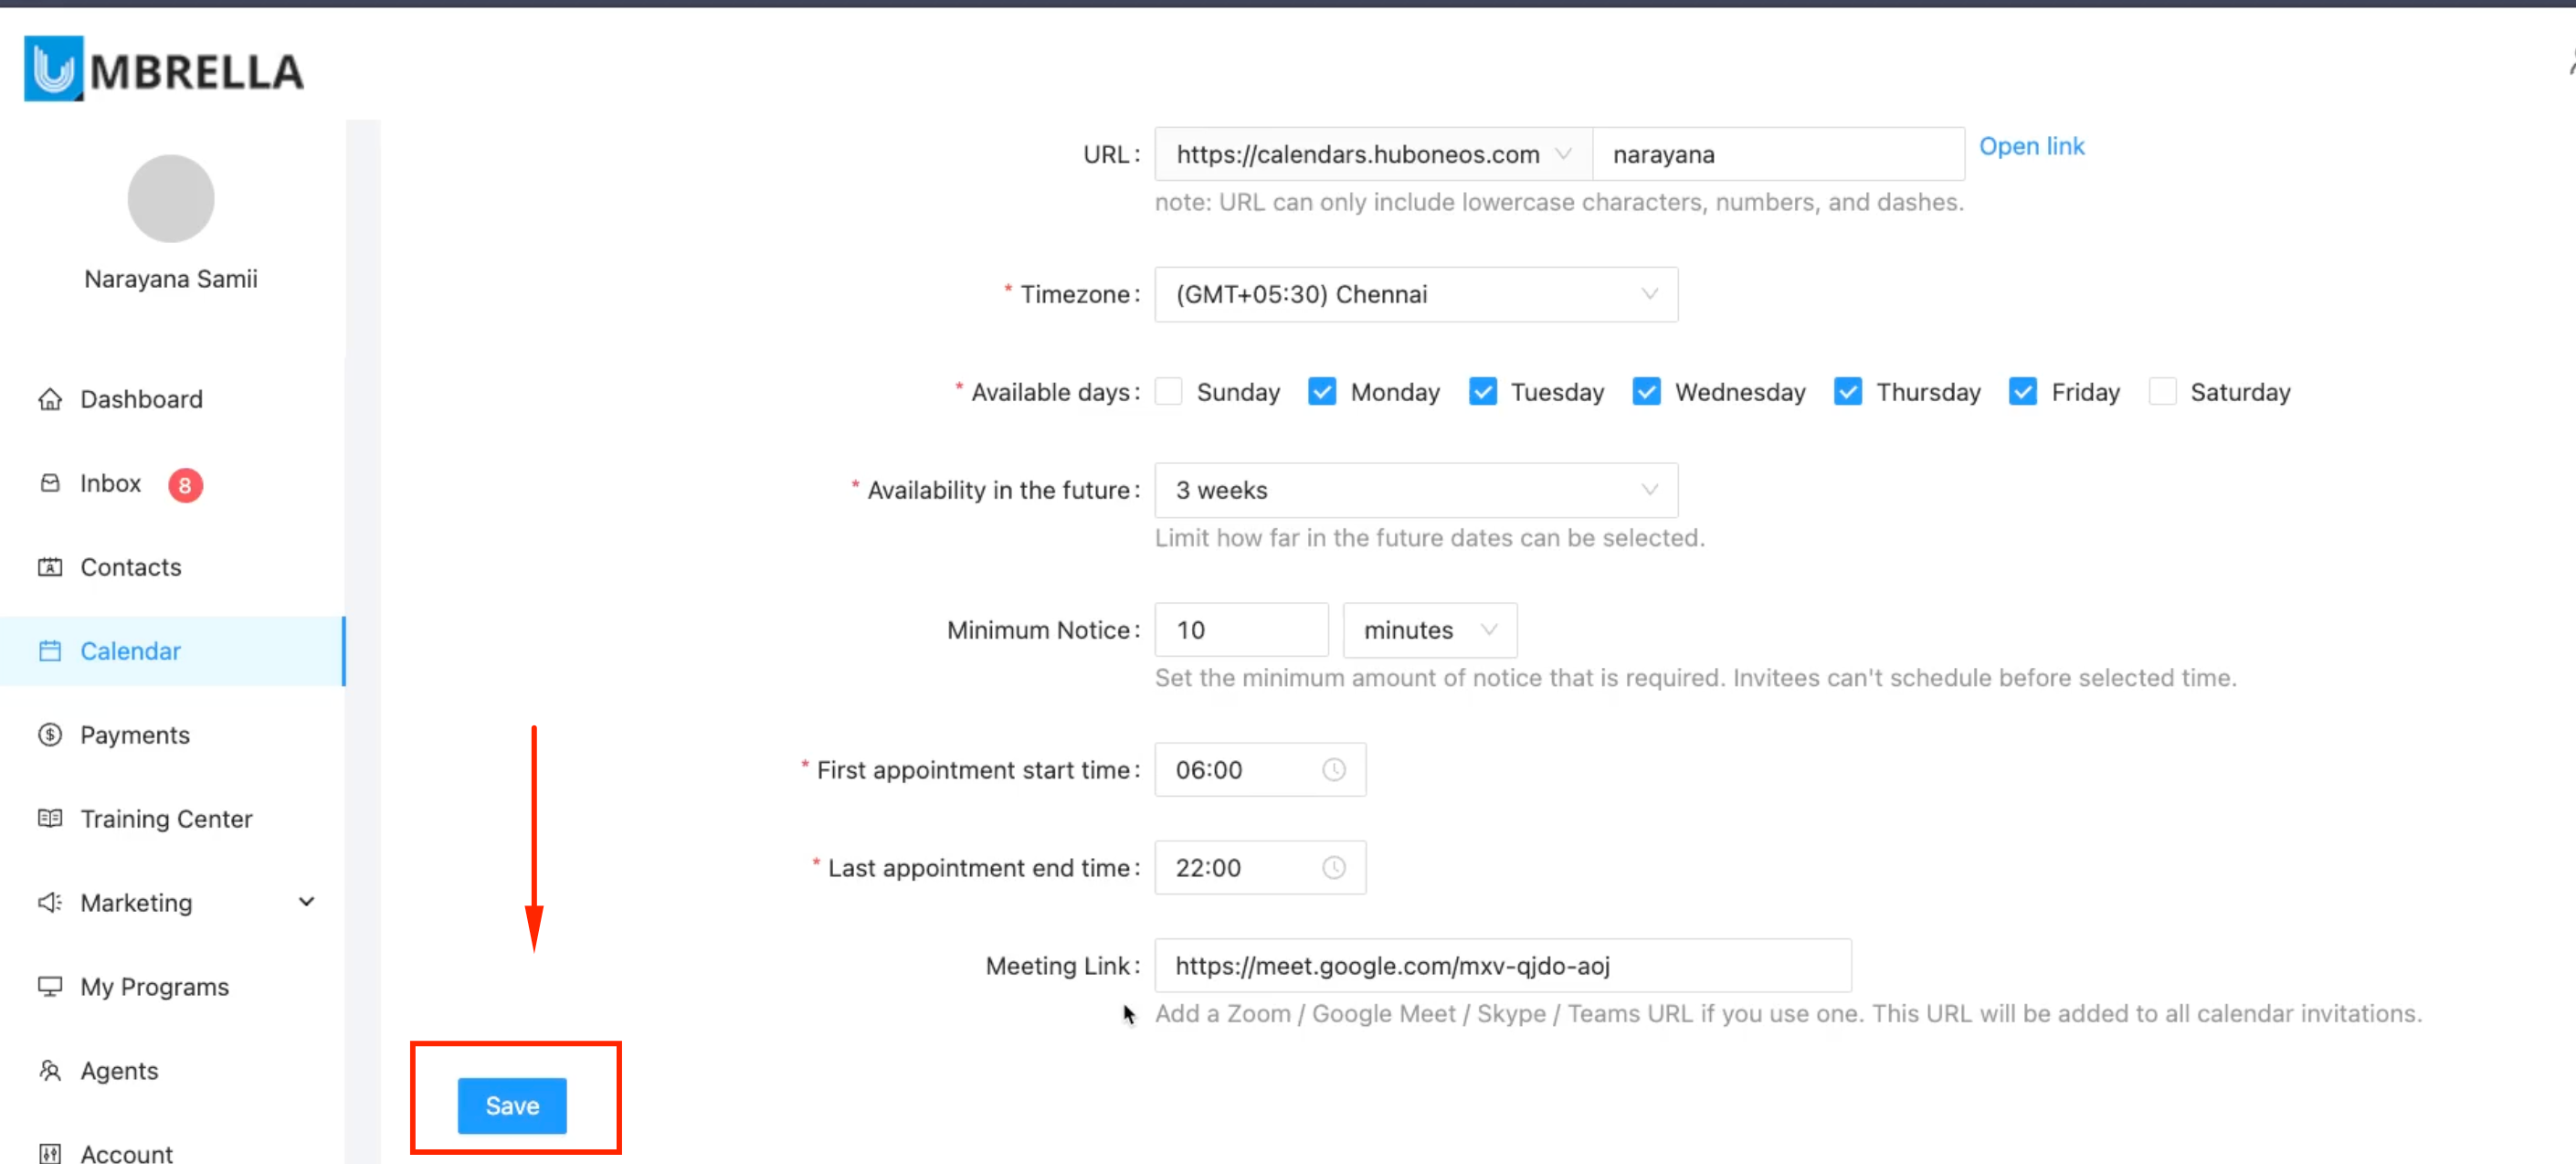
Adding Custom Meeting Links to Invitations
You can automatically include your preferred video conferencing link (like Google Meet, Zoom, Teams, etc.) in the calendar invitations sent out when someone books an appointment.
Benefit: Saves you from manually adding the meeting link each time. The correct link is included automatically for the client.
How to Add Your Meeting Link:
Go to the Calendar section.
Click the Edit calendar button near the top right.
Ensure you are on the General Settings tab.
Scroll down to the Meeting Link field.

Paste your permanent meeting URL (e.g., your personal Zoom room link, a Google Meet link) into this field. Note: Use only one URL.
Scroll down and click Save.