Personalize your communications by inserting contact-specific information stored in Custom Fields directly into your Email and SMS templates.
You must have already created the Custom Field(s) you wish to use. Please refer to the "Managing Custom Fields" guide if you haven't done this yet.
Steps to Use Custom Fields in a Template:
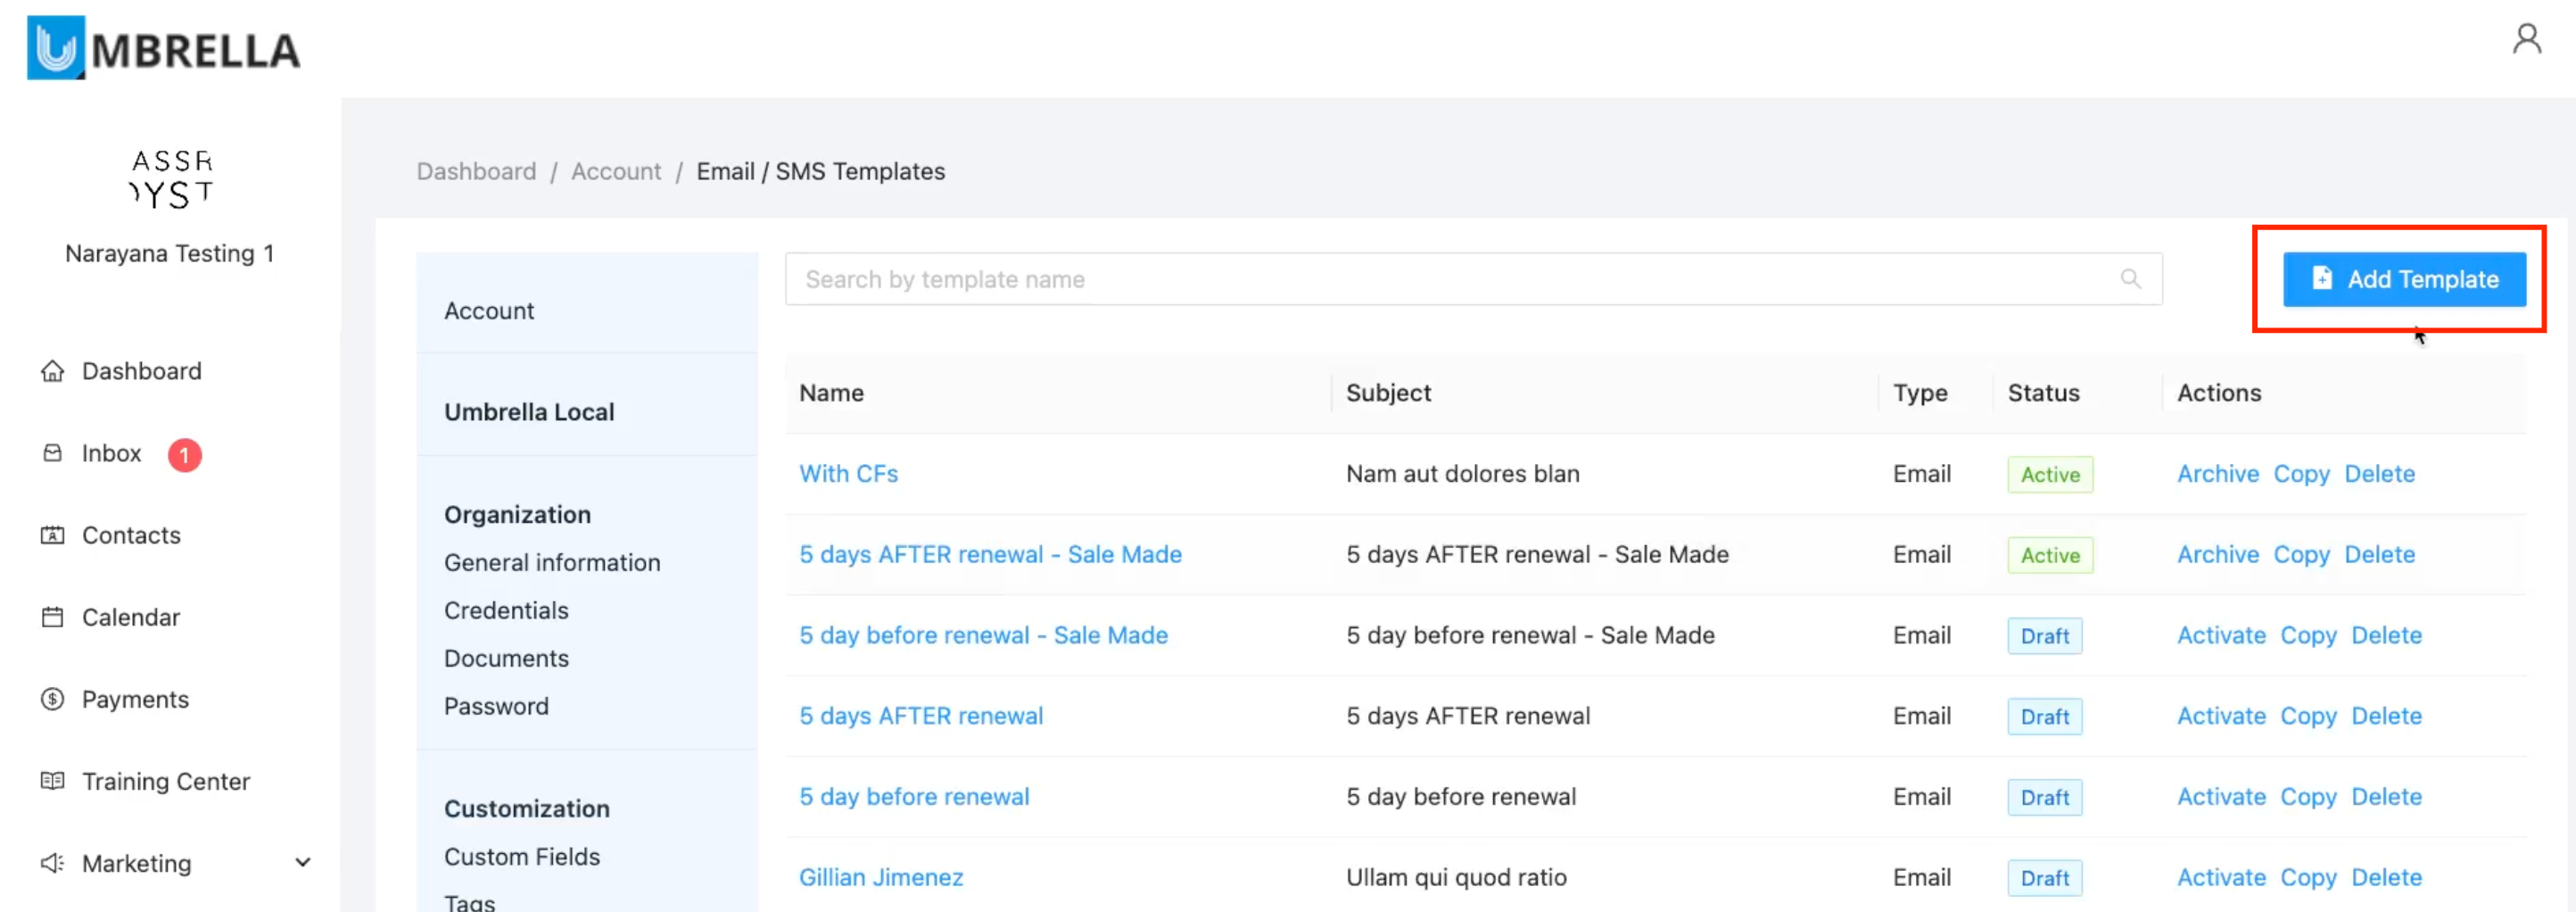
Navigate to Templates:
Click on Settings in the bottom-left main menu.
Under the Communication category, click on Email / SMS Templates.

Create a New Template:
Click the Add Template button in the top-right corner.
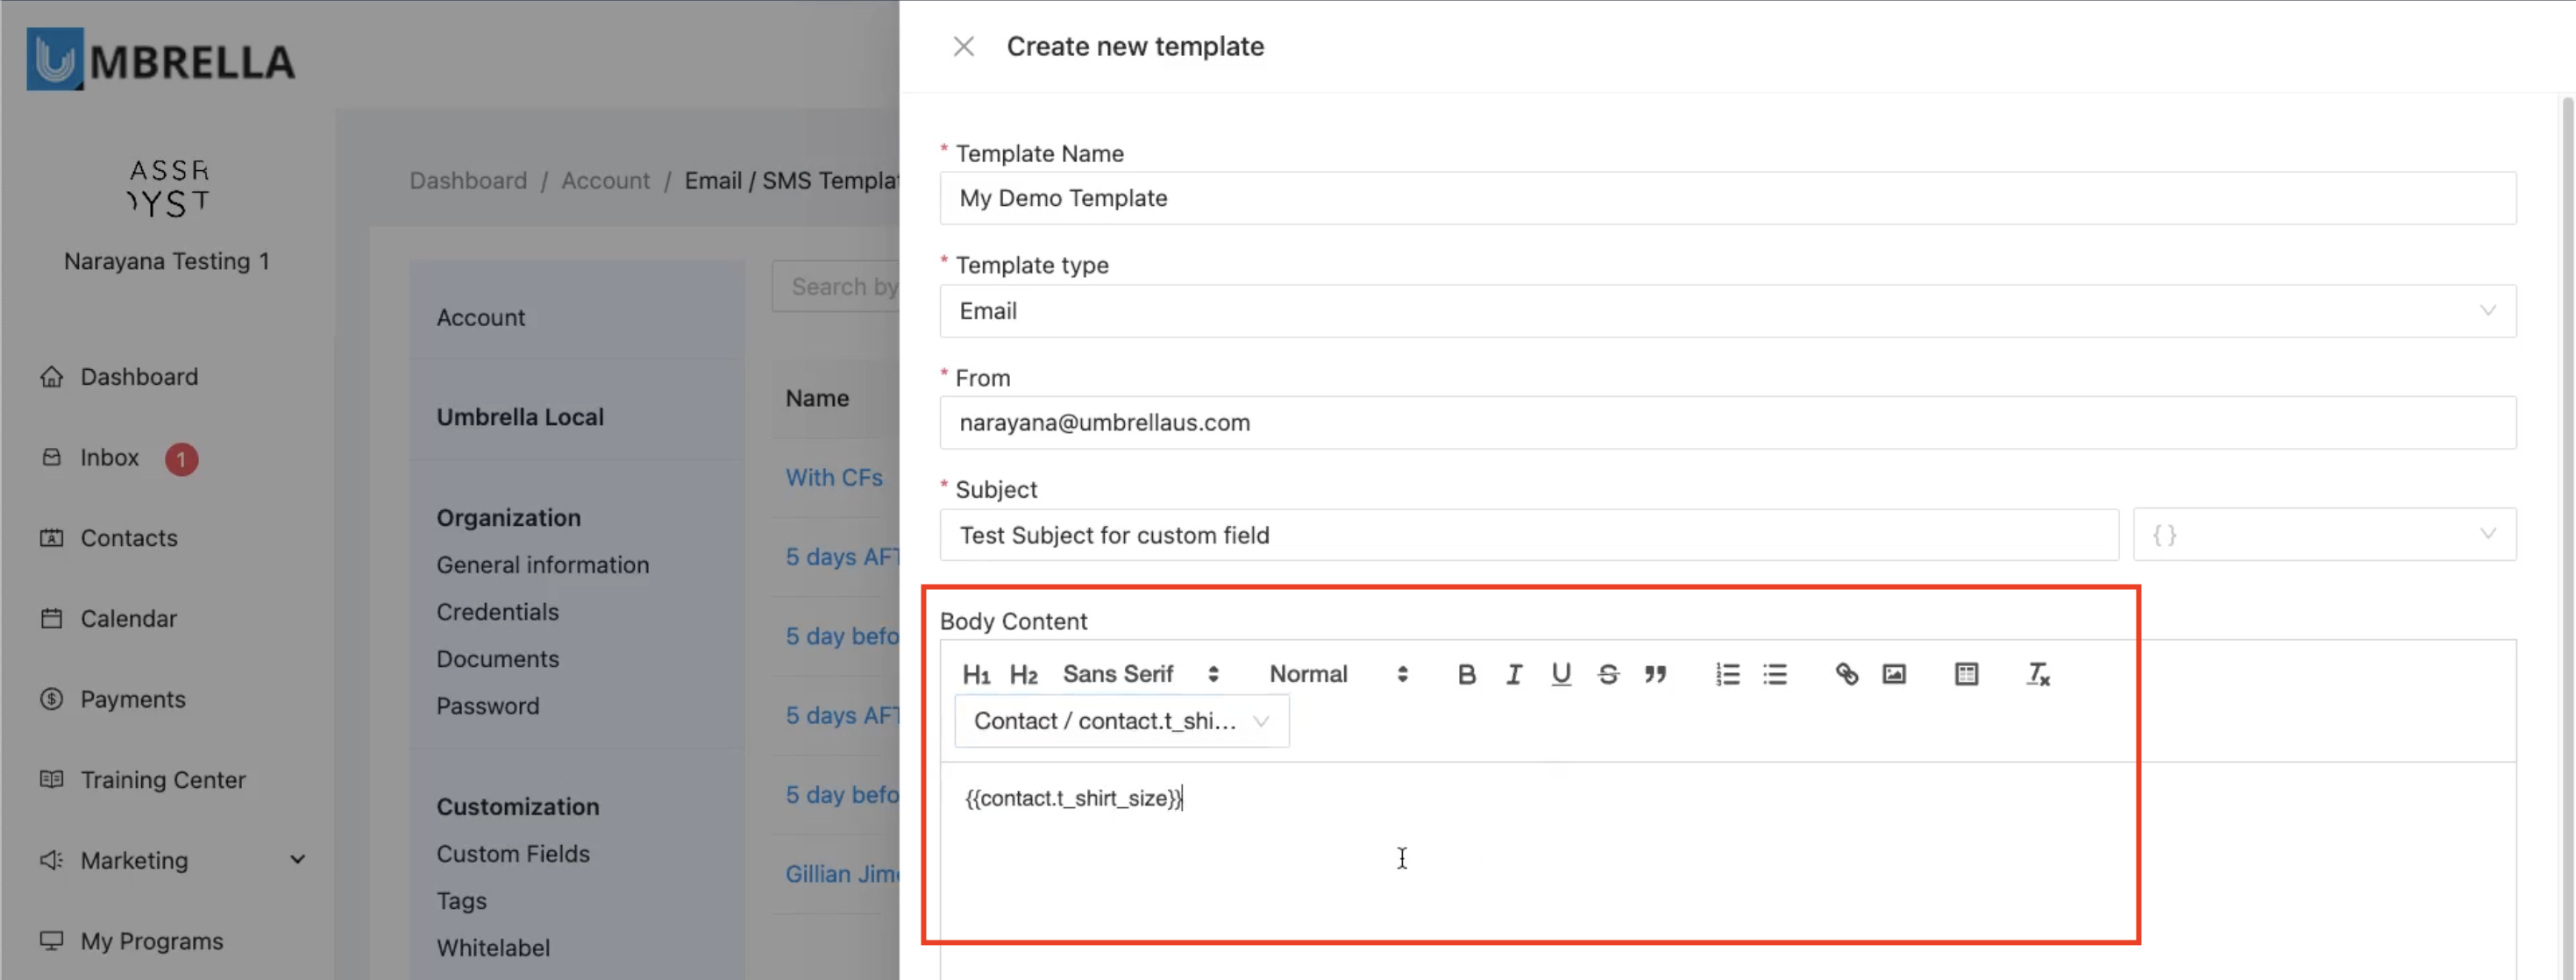
Enter a Template Name
Select the Template type (Email or SMS).
(For Email) Enter the From email address.
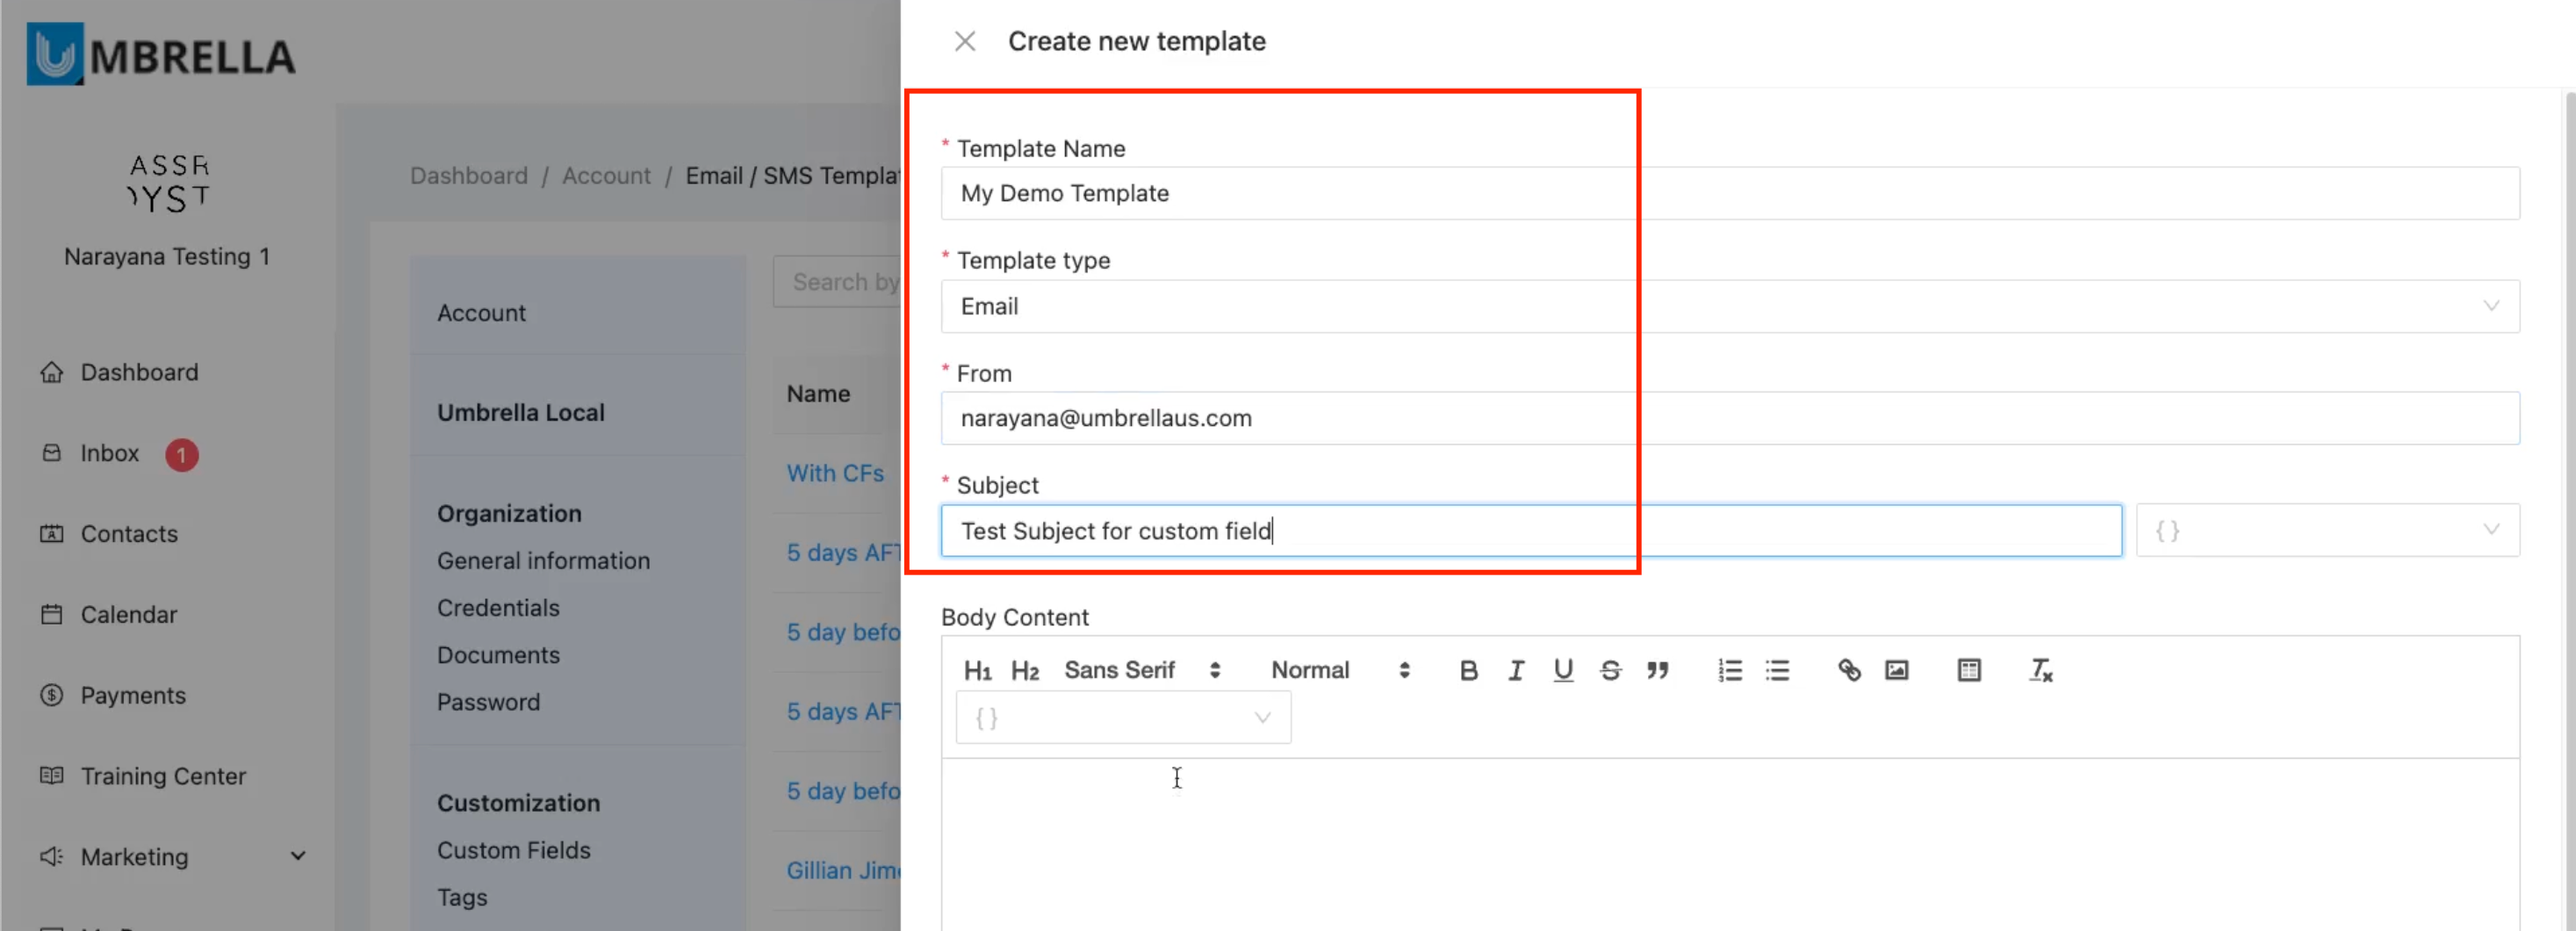
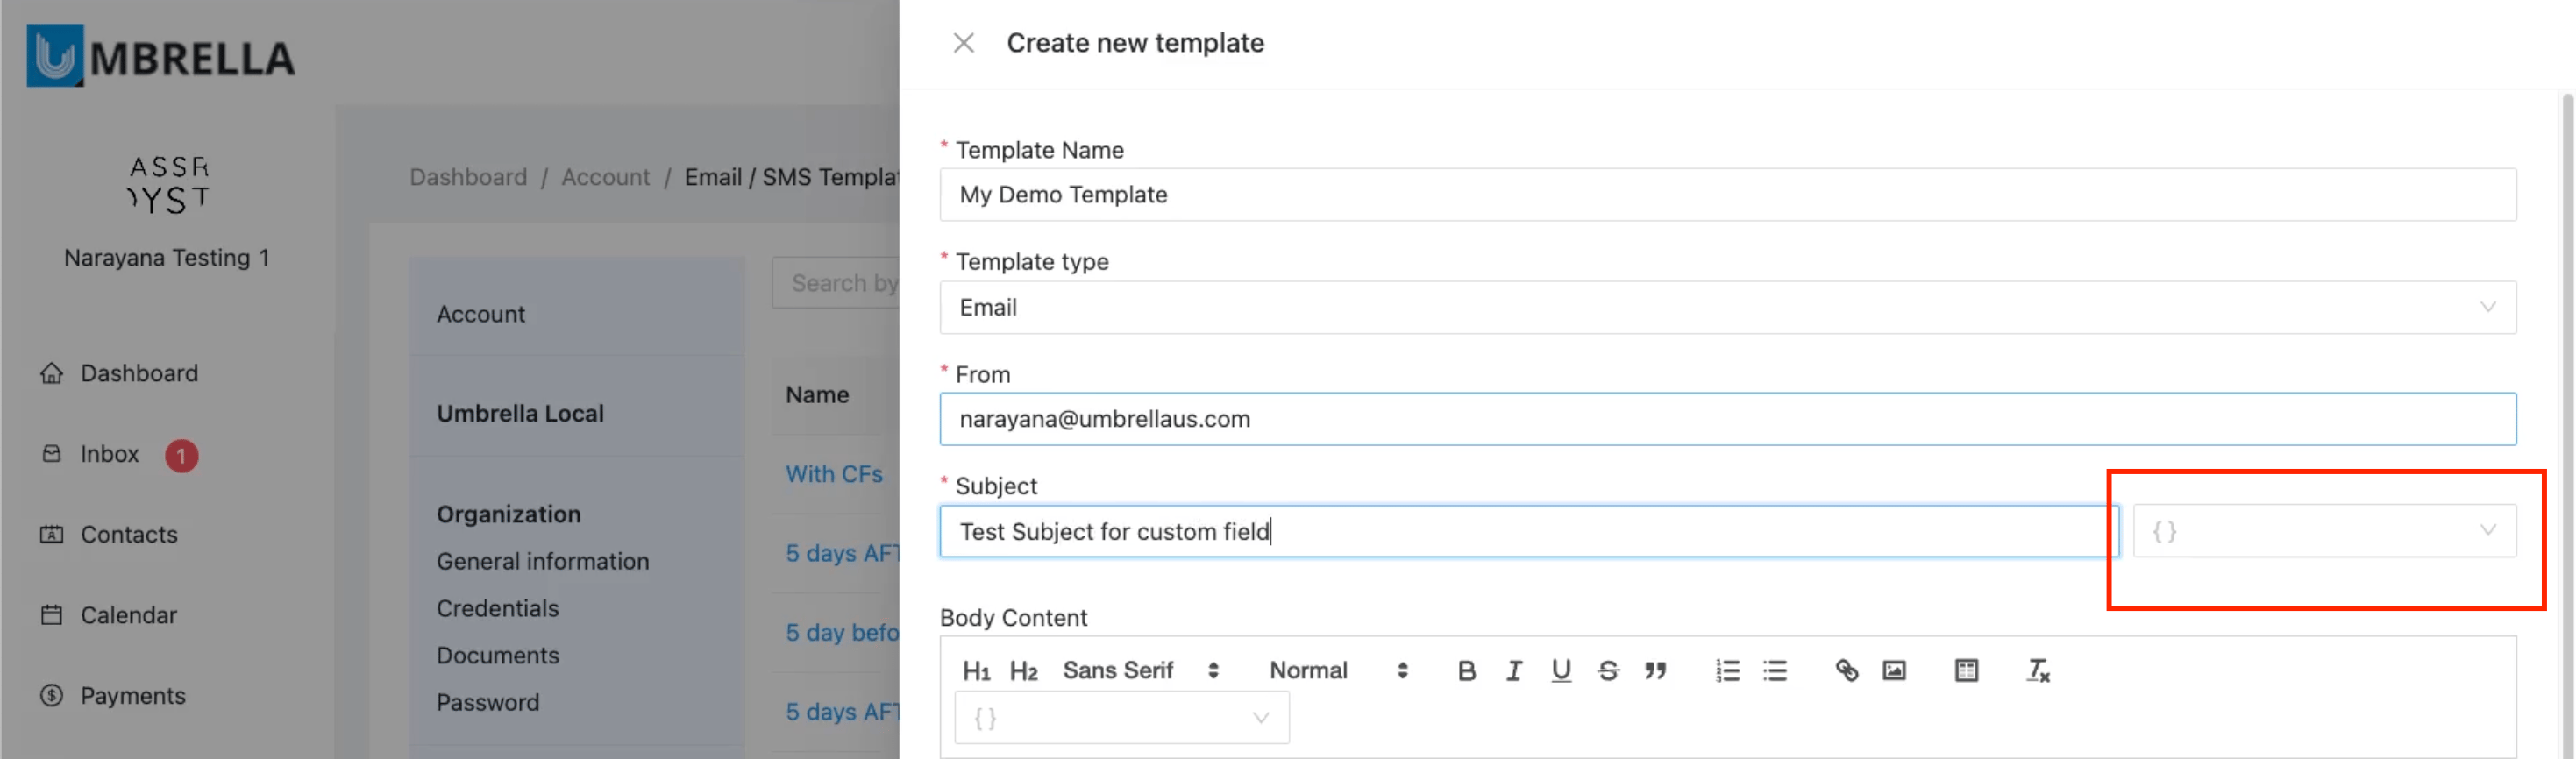
(For Email) Enter the Subject line. You can also insert placeholders here if needed by clicking the {} icon next to the subject field.
Insert Custom Field into Body:
In the Body Content editor, place your cursor where you want the custom information to appear.
Click the placeholder icon {} located in the editor's toolbar or dropdown list.
A list of available placeholders will appear. Select Contact.
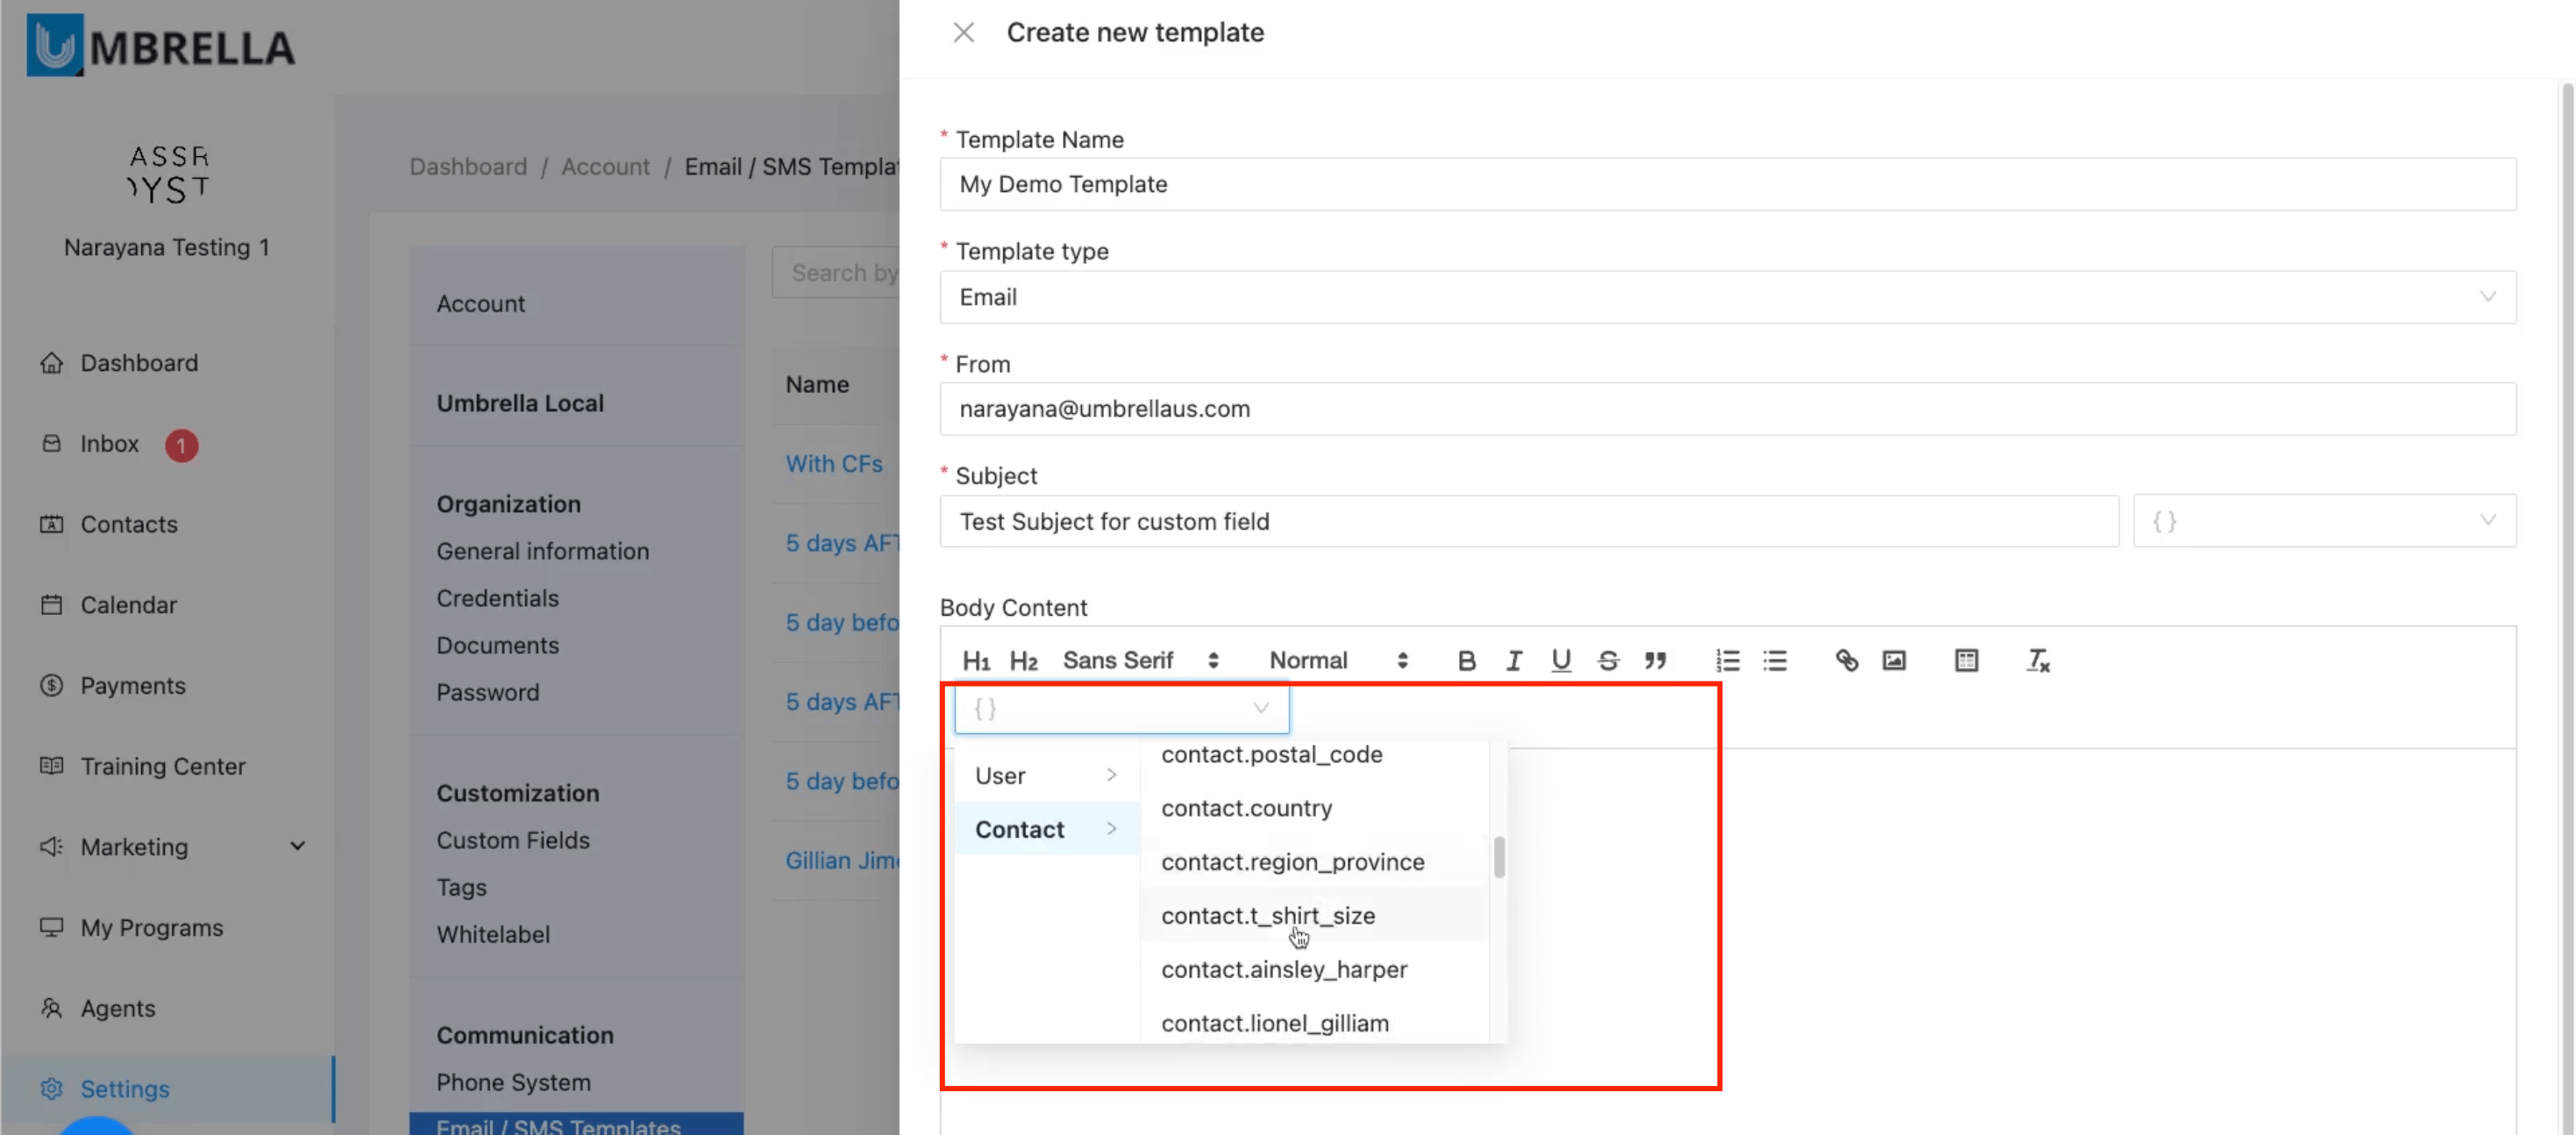
Scroll through the list of available contact fields. You will see your previously created Custom Fields listed
Click on the desired Custom Field name.
The corresponding placeholder (e.g., {{contact.t_shirt_size}}) will be inserted into the template body.
Complete and Save Template:
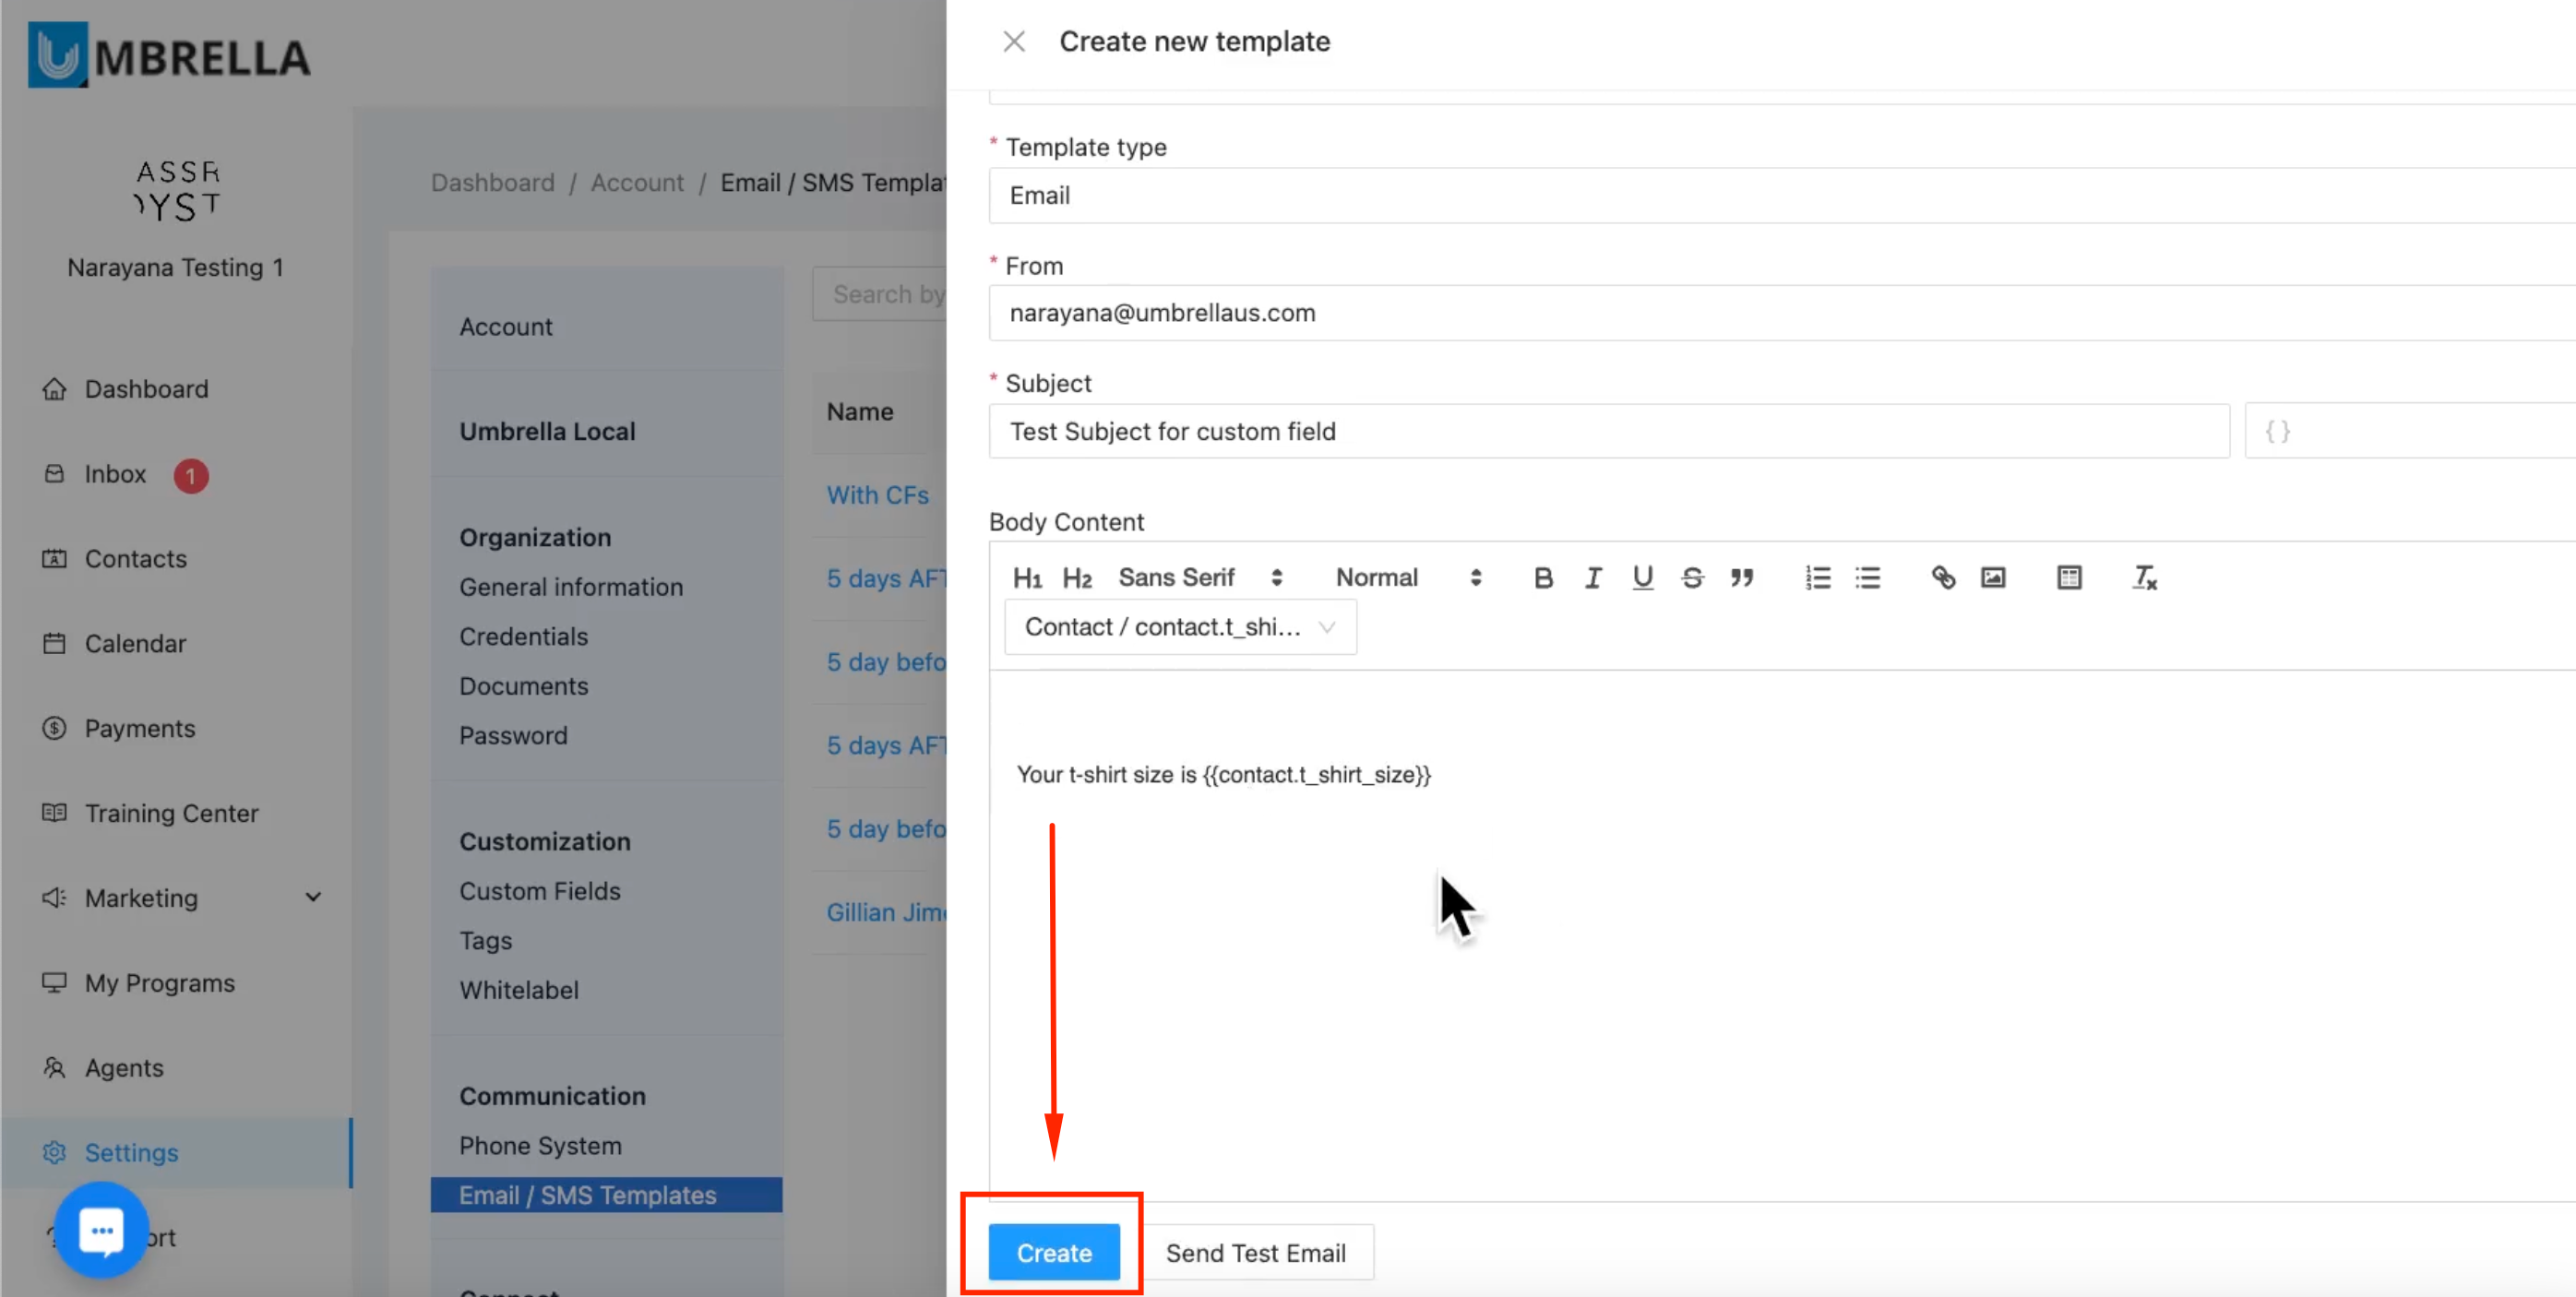
Add any surrounding text needed in the body content (e.g., "Your t-shirt size is {{contact.t_shirt_size}}").
Once the template content is complete, click the Create button.
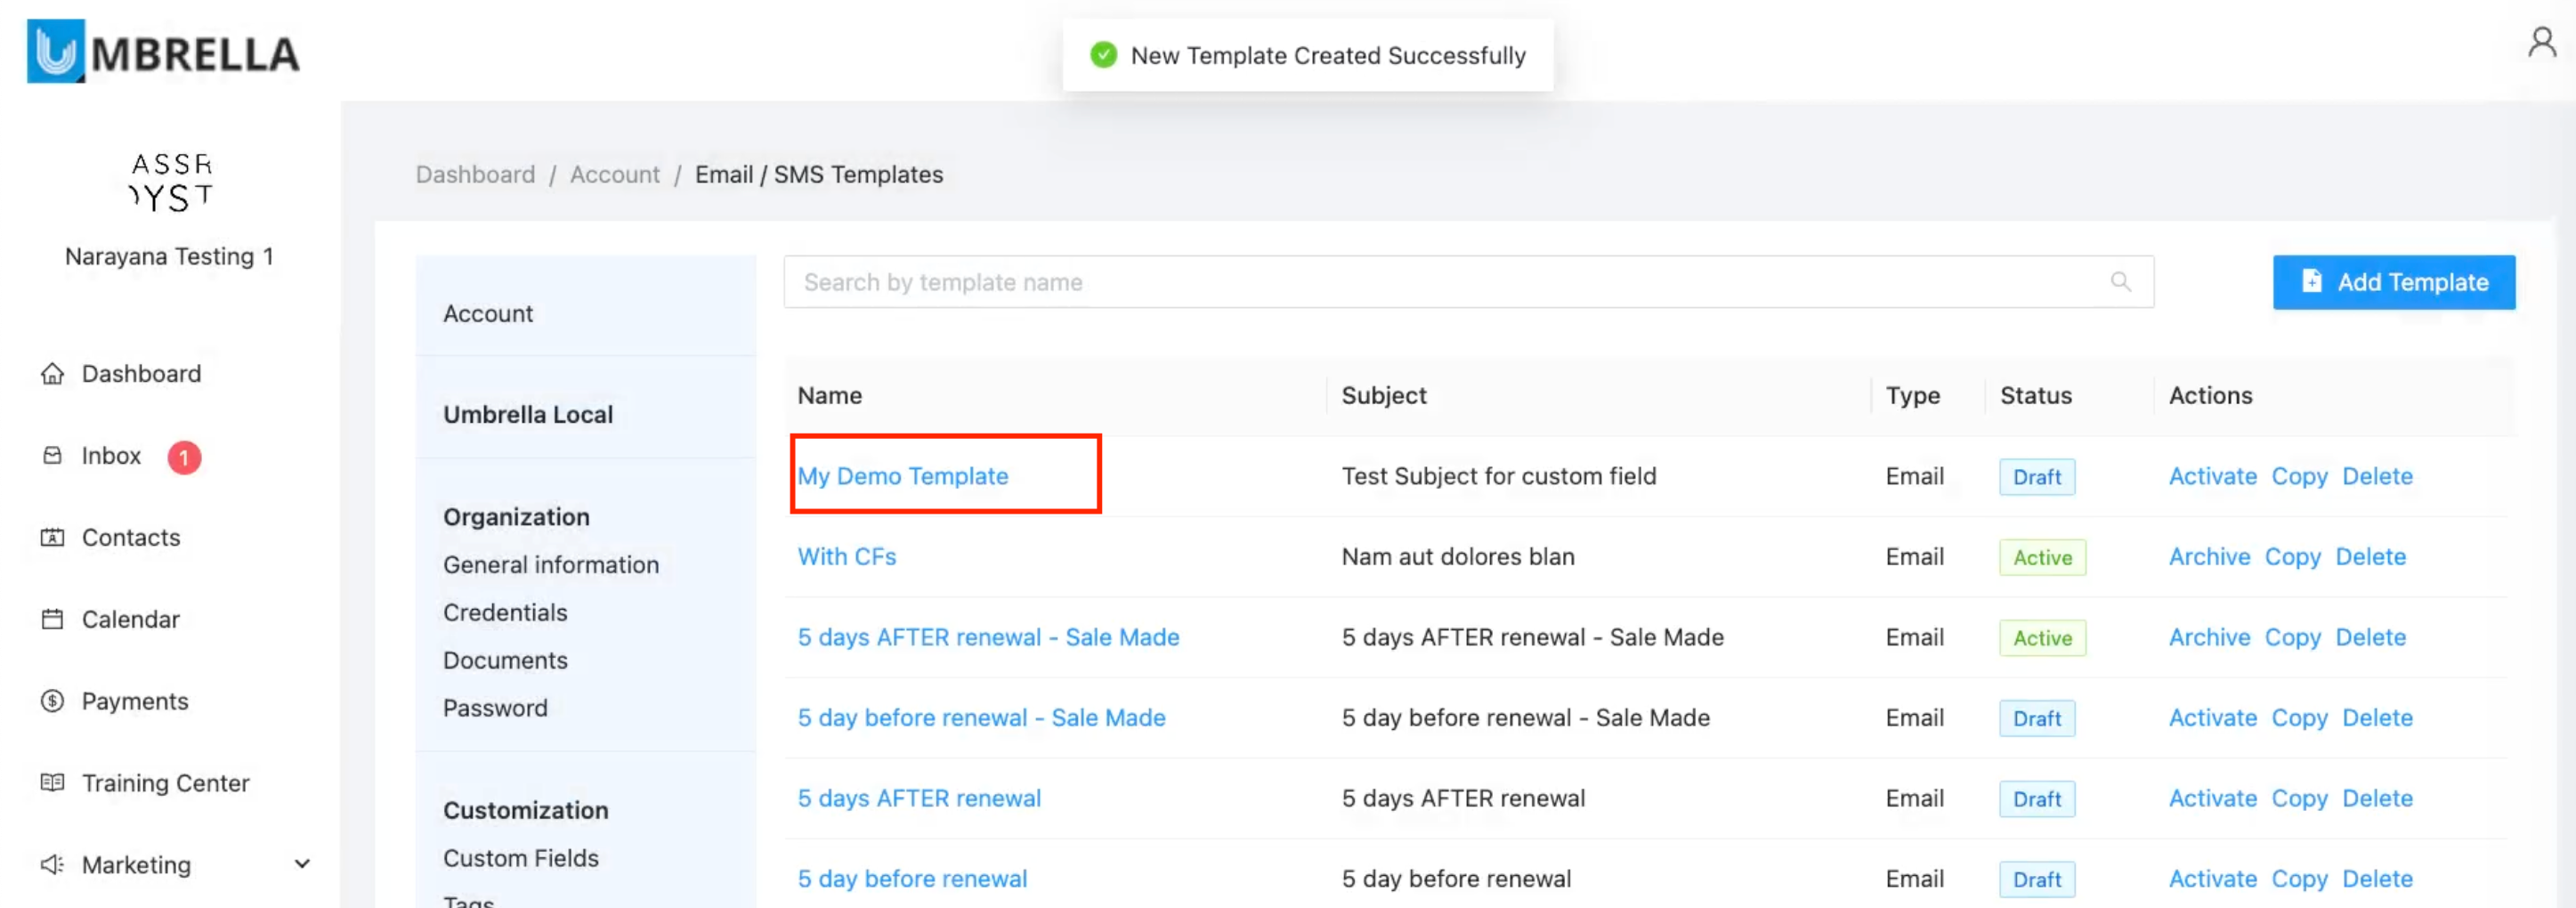
Result:
The template ("My Demo Template" in the example) is created and saved. You will see it listed on the Email / SMS Templates screen.
This template can now be selected and used when sending emails or SMS messages to contacts (e.g., from the Contact Conversations page, which will be covered separately). When sent, the placeholder {{contact.t_shirt_size}} will be automatically replaced with the actual T-shirt size value stored for that specific contact.
